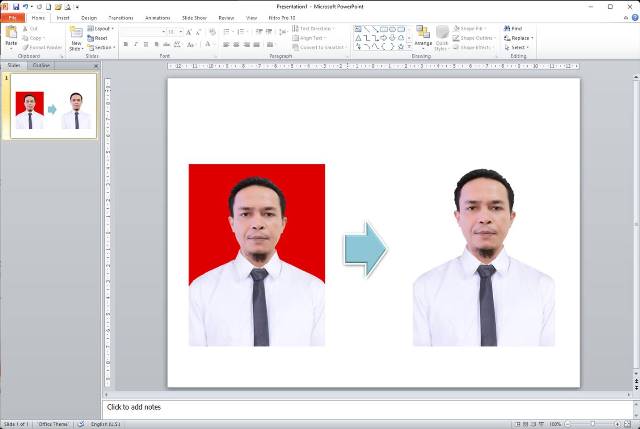
You can easily remove the background of an image using PowerPoint. This method is very practical, fast and easy. For those of you who are not familiar with more complex and complicated photo editor software such as Adobe Photoshop, this guide is perfect for you.
The practice in this guide uses PowerPoint 2010, You can also apply it to newer PowerPoints.
How to Remove Image Backgrounds in PowerPoint
To delete an image background in PowerPoint, follow these steps below
List of contents
Use the Remove Background tool
To use tools Remove Background of PowerPoint, follow these steps:
- Open the PowerPoint application then insert the image you want to edit into the slide. You can use the method Insert image into Word to insert pictures into PowerPoint.
- Once the image is on the slide, Click on the image and a menu will appear Picture Tools, then click tab Format (or Picture Format if you are using a newer PowerPoint).
- On the tab Format or Picture Format, select Remove Background
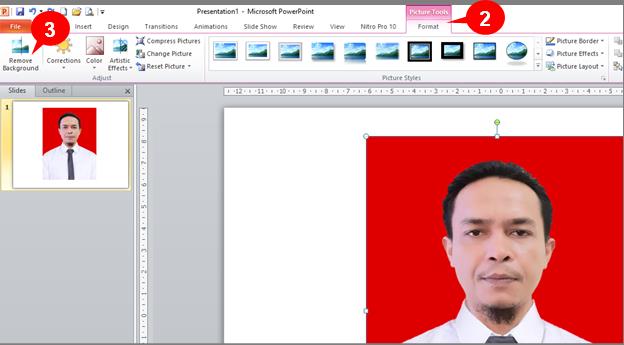
Hapus Area Background
Pay attention to this section, after you click Remove Background, some of the images change color to dark. The dark part is the part that will be deleted. You can customize the areas you want to keep or delete by changing dark areas to light ones or vice versa.
1. Select Background Area
If you use PowerPoint 2010, when you activate the tool Remove Background, You will see a cutting frame with eight dots. Click and drag one corner of the cutter frame to adjust the removed part, so that the dark area on the picture changes to light again as before.
If you are using a newer PowerPoint, proceed to step number two below.
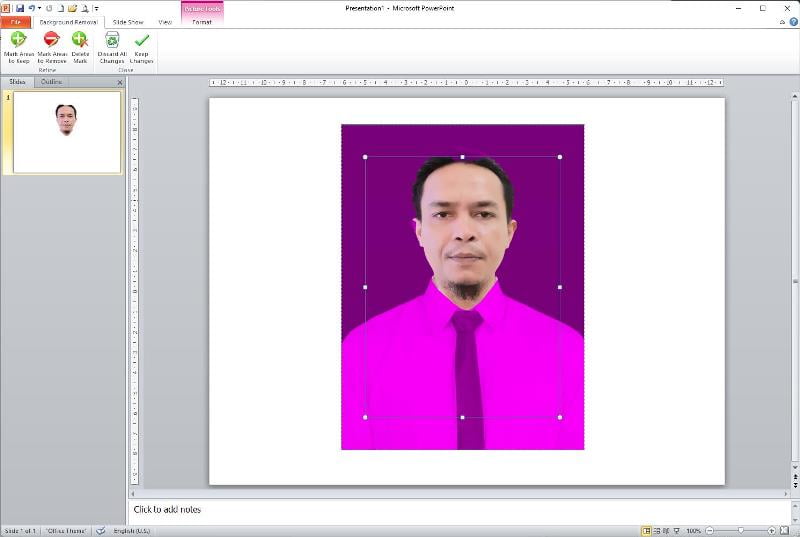
2. Mark Defensible Areas
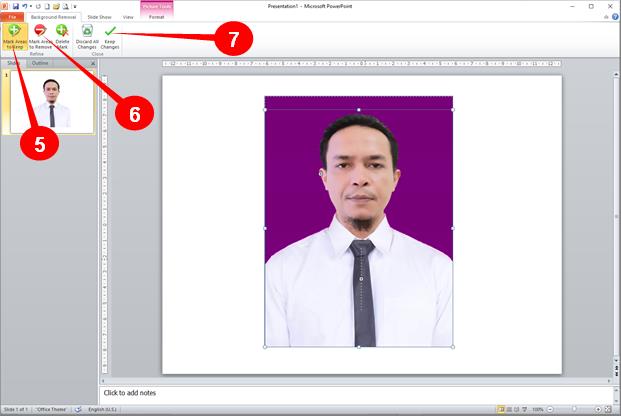
To mark the area you want to maintain, click the button Mark Areas to Keep (step no 5 image below) until the cursor changes shape into a pencil, then click and drag on the area you want to keep, so that the area turns bright
3. Mark Areas for Deletion
To mark the area you want to delete, use the button Mark Areas to Remove (step no 6 image below) then click and drag on the area of the image you want to delete, then that part will turn dark.
4. Save Changes
Once finished, mark the areas you want to keep or those you want to delete, click the button Keep Changes (step no 7 image below) to save changes.
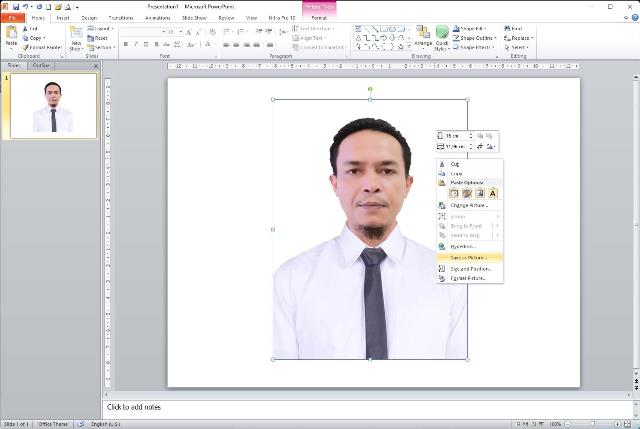
Save Picture
Once finished deleting the image background, You can save the image as a new image. Right click and click Save as Picture
If you want to add a new background with a different color, see the guide How to edit photo backgrounds using PowerPoint.
Watch the video tutorial below.
Finished, That's a quick and easy way to remove an image background using Microsoft Powerpoint, good luck. Also watch other video tutorials at My YouTube channel.
Hope it is useful.
Well done, boss,,There's already a video. If you can find all the tutorials, there's a video.
Comments are closed.