You can quickly flip a picture or video in PowerPoint and save it back as if you had a new picture or video.
By flipping an image or video in Powerpoint, You can save it again as a new image or video and upload it to social media such as facebook, Twitter or Instagram.
This short tutorial will show you two ways to flip an image or video using PowerPoint, also how to save images and videos in PowerPoint.
List of contents
Normal Way to Flip an Image or Video in PowerPoint
To rotate and flip images, You can use the drawing tools found in PowerPoint, do the following steps:
- Insert a picture or video into PowerPoint. You can insert images by copy-pasting or via the menu Insert. You can follow the same method now insert pictures into Word.
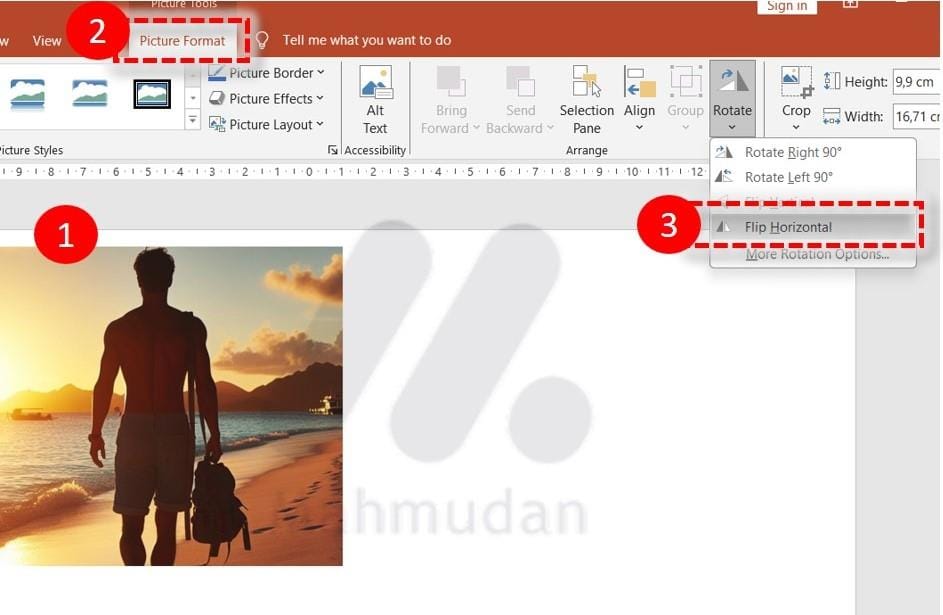
- After inserting the image into PowerPoint, Click on the image and a new tab will appear, namely Picture Format. If you enter a video then what appears is a tab Video Format
- On the tab Picture Format or Video Format, in section Arrange, click Rotate then select one of the rotations you want to apply, Flip Vertical or Flip Horizontal, in this guide the rotation selected is Flip Horizontal.

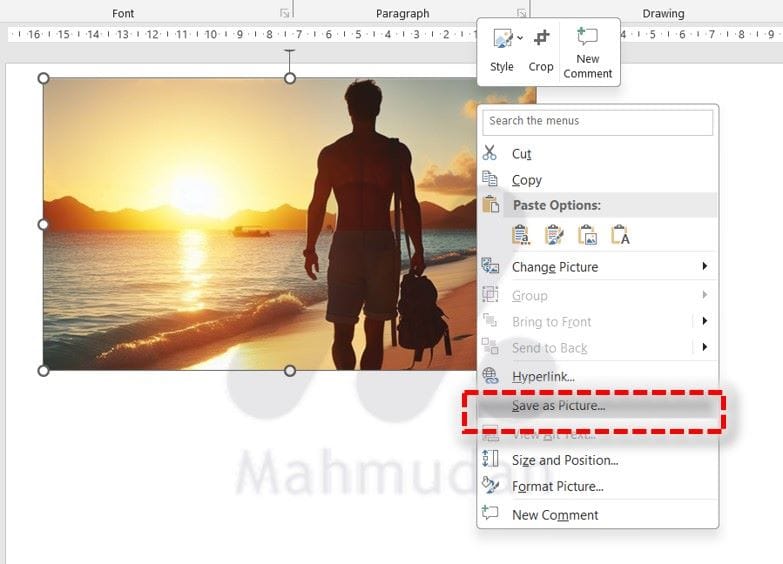
- Save your new picture. Right click on the picture and select Save As Picture. If you flip the video, see how to save videos on the following guide.

How to Quickly Flip an Image or Video in PowerPoint
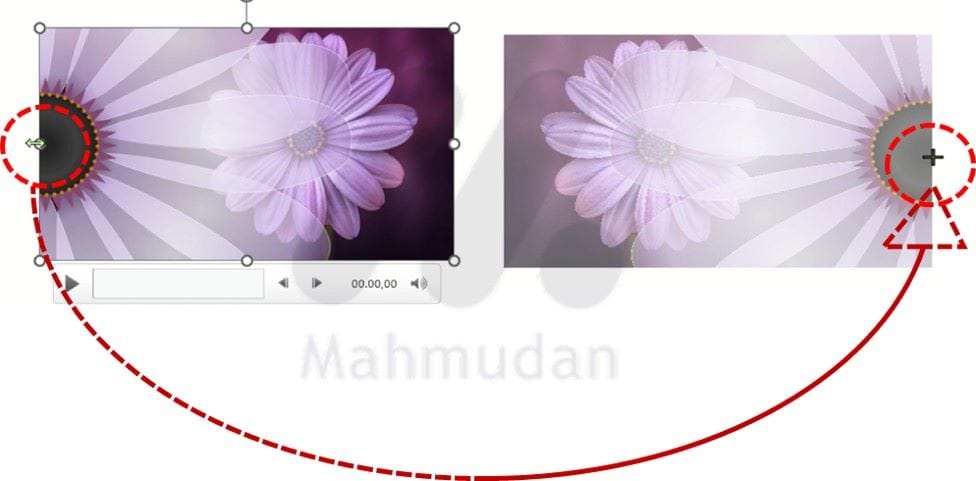
You can also rotate or flip the image using the markers on the image Click and Drag. Method The same method for the video you want to flip. Practice the steps below by flipping the video.
- Click on the video so that eight dots appear on the edge of the video.
- Point the mouse pointer at a point on one side of the video so that the mouse pointer changes shape into a double arrow.
- Click on one of the points then drag it to the opposite side.

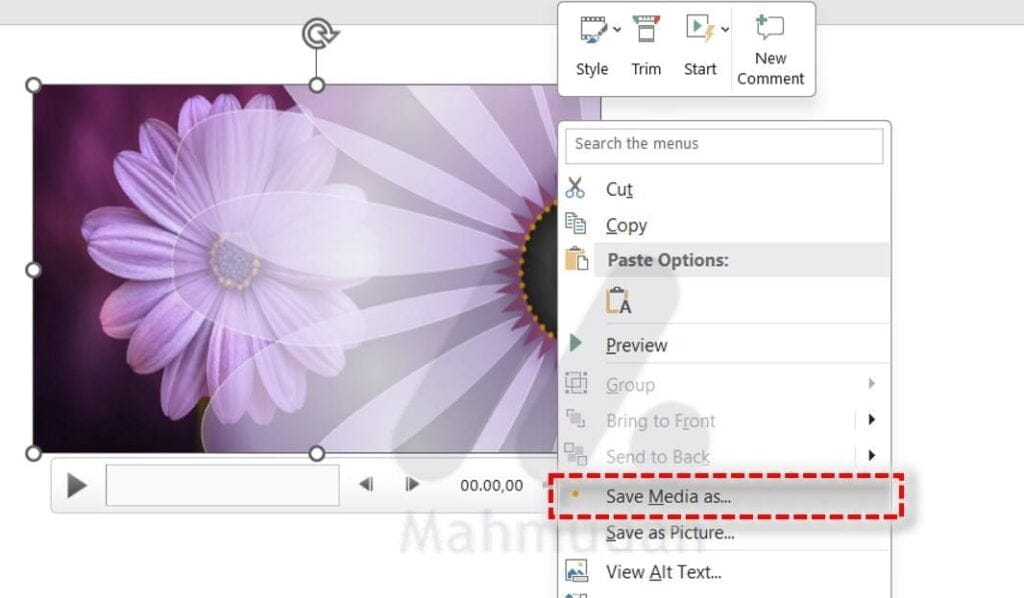
- Furthermore, save the video by right clicking then selecting Save Media As

Hope it is useful.
