Some Word applications use different default fonts. You may not always or even rarely use the Word application's default fonts. Therefore you may need to change Word's default font to a font type that you frequently use.
Microsoft Word 2003 use the default font Times New Roman with size 12. Meanwhile, Microsoft Word 2007 and newer versions use the default font Calipers with size 11. When you're just starting out typing letters in Word, The Word application automatically uses the default Word application font according to the version you are using.
If you create an official document for example, The fonts that are often used areTimes New Roman or Arial with size 12pt. Therefore, You don't need to change fonts when typing a new paragraph. Actually, Microsoft has provided the option to change the default font of Word for your convenience.
You can change Word's default font, again Time New Roman become Arial or Bookman Old Style in Word 2003. Or, You can also change Word's default font, from Calipers become Times New Roman or others.
Steps to Change Word's Default Font
This quick guide will show you how to change Word's default font in just three easy steps. You can practice the following steps on any version of the Microsoft Word application, starting from Word 2007 to Word 2021
Total Time: 2 minute
Steps 1: Open the Font Menu

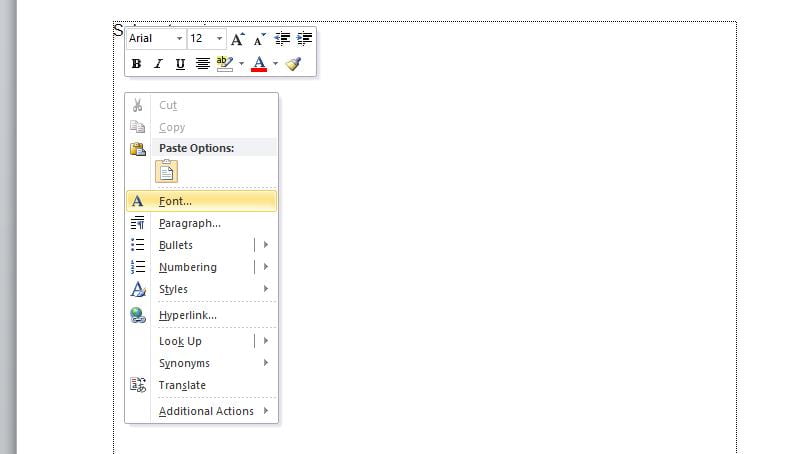
Open the app Word, right click on the document and select Font, then the Font dialog box will appear
Steps 2: Select Font

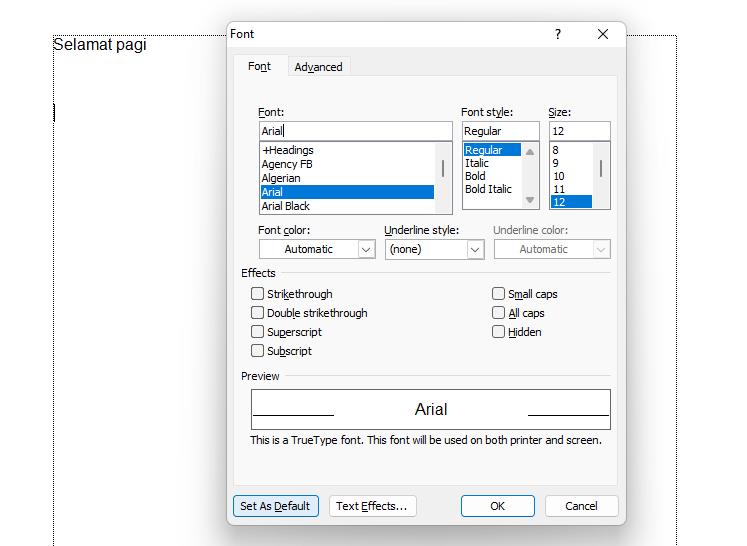
On the dialog box Font, Select the font type and size you want. For example fonts Arial size 12
Steps 3: Set As Default Font

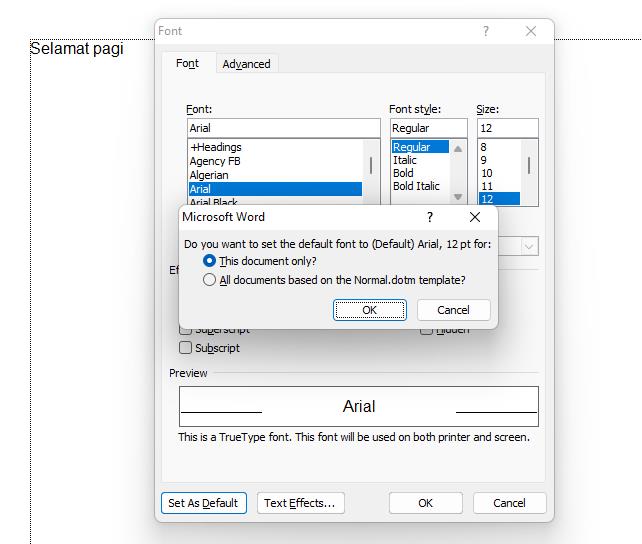
After selecting the type and size of the font you want, click the button Set As Default, then the application will display a confirmation dialog box.
1. If you want to set the font you selected as the default font for the document (which you are currently opening) just this then choose This document only then click OK.
2. If you want to set the font you selected as the default font for all documents, then choose All documents based on Normal.dotm then click OK.
Choosing the second option is very useful if you often use the same type of font for each of your documents.
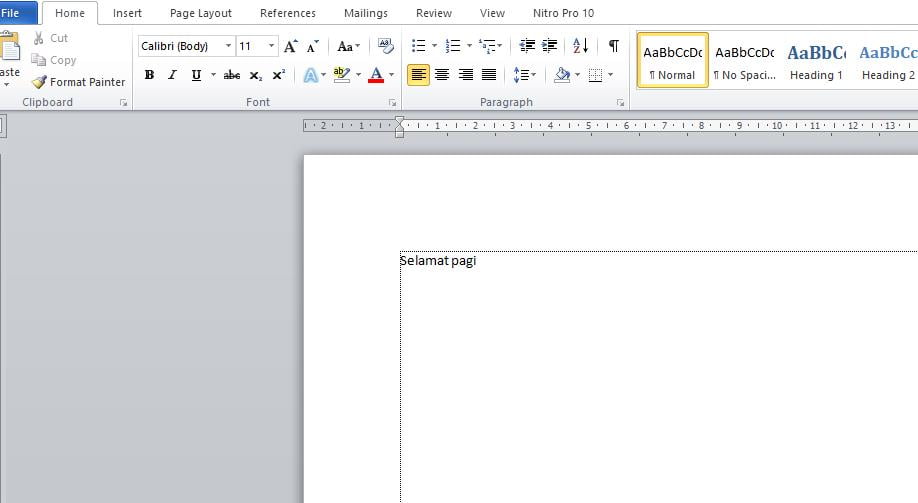
Close the Microsoft Word application then reopen it, The Microsoft Word application will open with the Arial font as the default font.
That's how to change the default Word font in just three easy steps. Hope it is useful.
Watch it video on how to change the default font in Microsoft Word
