Here's how to make a letterhead in Word in five steps that are easy for you to practice. You can find out how to insert a letterhead logo, how to make a letterhead outline, and how to set the letterhead only on the first page.
The components in a letterhead which constitute the identity of an organization include the logo, name of business or organization, complete address, phone number, email address, official website, and fax.
The following guide shows how to create a letterhead in Word in five easy-to-practice steps. The practices in this guide use Microsoft Word 2021, but you can also apply it to any version of Word.
List of contents:
Steps to Create a Letterhead in Word
The following five steps will guide you on how to create a letterhead in Word that is easy to practice.
Total Time: 10 minute
Steps 1: Enable Headers
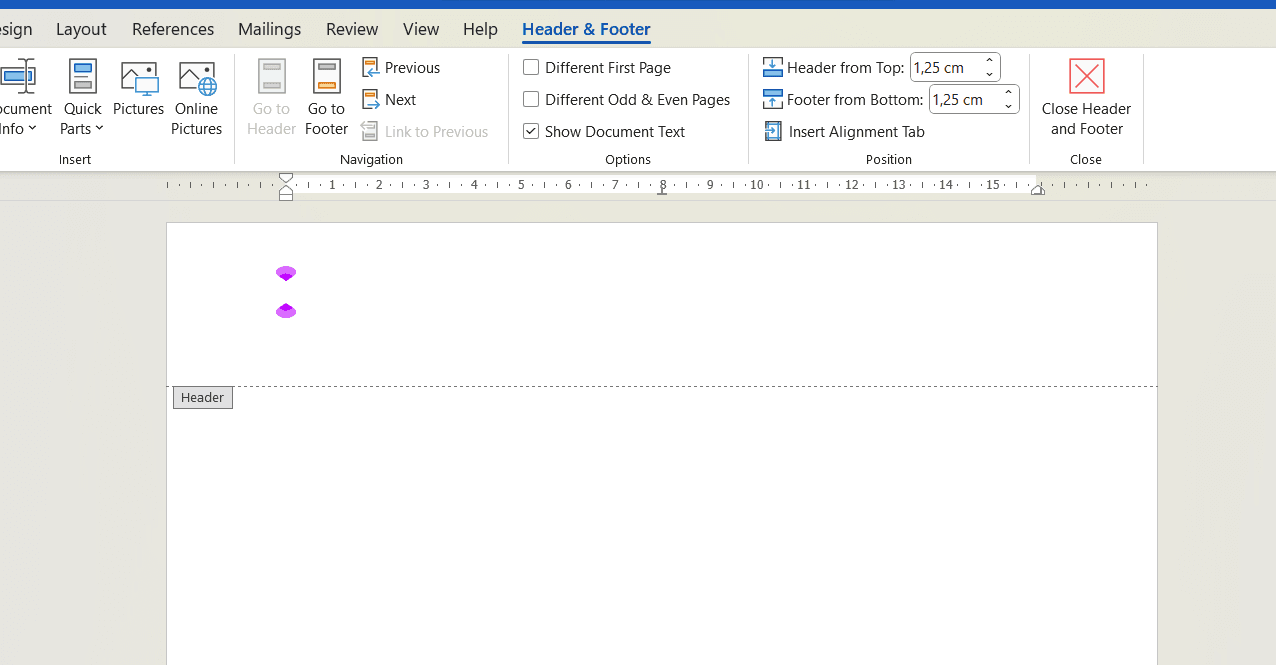
After you open the Word document, The first step in creating a letterhead is activating it Header because the letterhead is in the section Header documents. To activate Header, double click on the top of the document then Header become active.
Steps 2: Insert Logo into Header
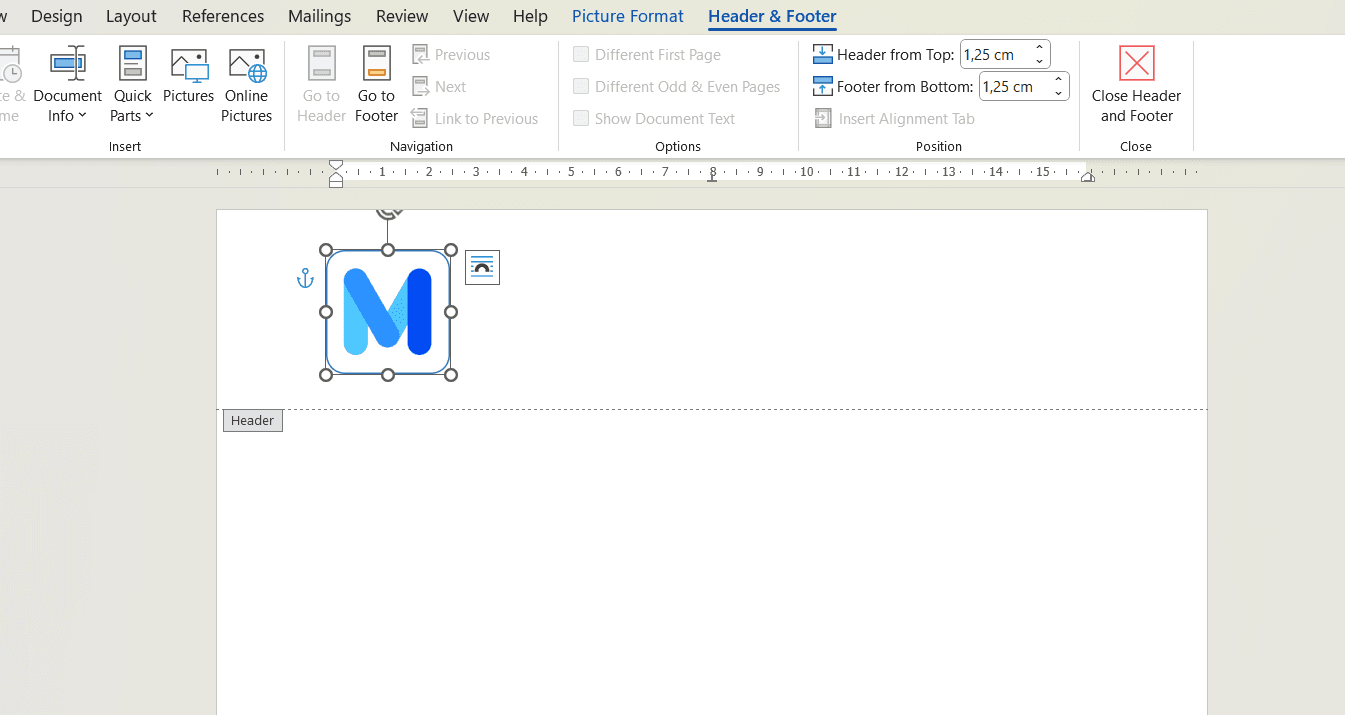
After Header active, insert the logo image into Header. You can insert pictures to Header by copying and pasting. If you're still having trouble, You can learn how to insert images into Word. Then adjust the size and position of the logo to suit, You can learn how to change the size and position of an image in Word.
Steps 3: Add Organization/Company Identity
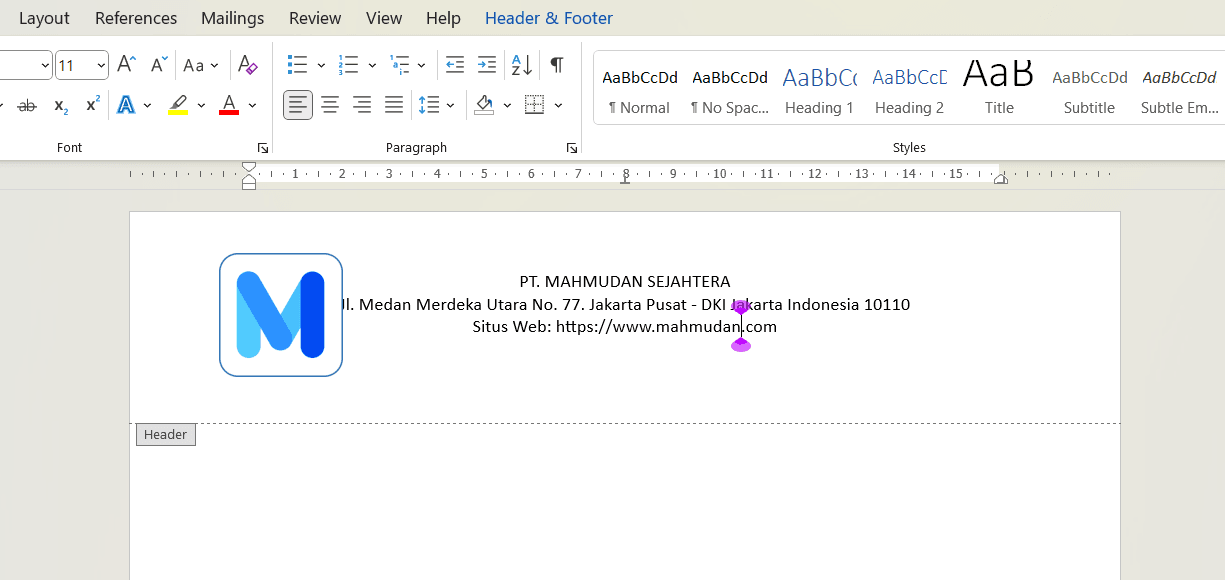
Type letterhead text that represents the identity of your organization or company such as the name of the organization, address, phone number, and others. You can center align text on letterhead using tab stop the center alignment has been created automatically. Before adding text, press tab then the cursor position will move to the center.
Steps 4: Set the Style and Position of the Letterhead Text
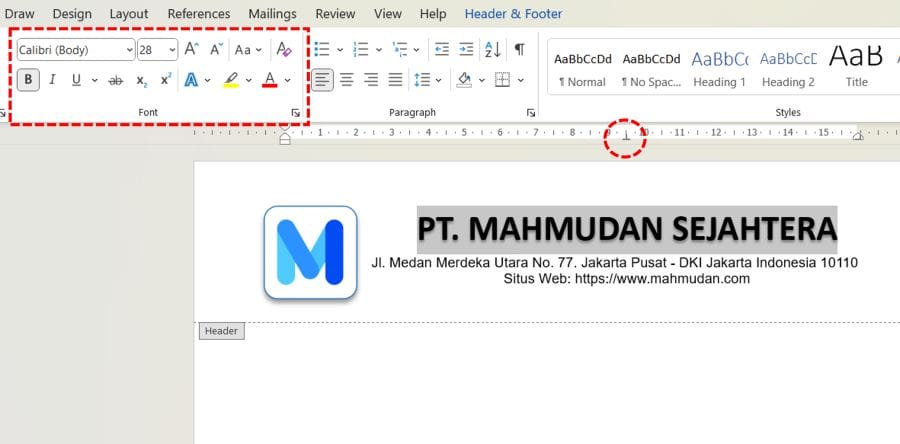
Set the text format by changing the size, the type and style of text font on the letterhead to match the characteristics or character of the organization / your company. To format text, highlight text, then on tab Home part Font, select font size, the type of font and style you want. Also adjust the position of the text on the letterhead so that it fits and balances with the logo by sliding tab stop.
Steps 5: Add a Letterhead Cover Line
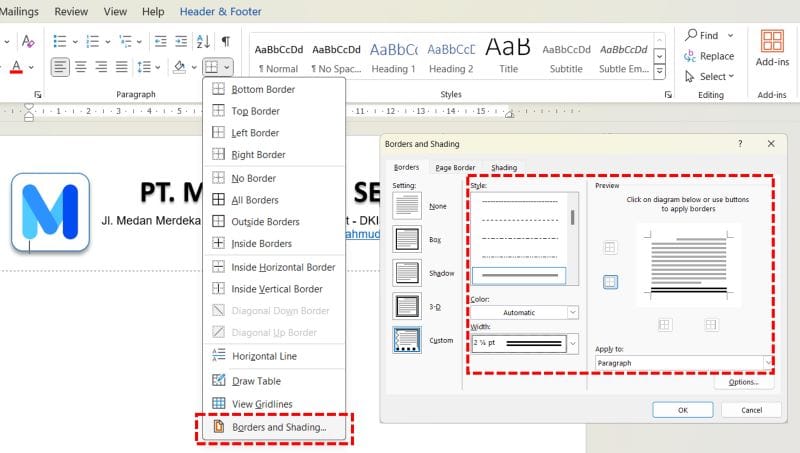
The best way to create a letterhead outline in Word is to use borders. With borders You can set the style, color and line size. To create a letterhead line in Word, press Enter after the last text, then on tab Home part Paragraph click Borders and Shading… Then select the line style and size you want.
The five main steps on how to make a letterhead in Word have been completed. Next, you can set the letterhead only for the first page. This is useful when the letter you create has more than one page.
How to Set Letterhead for First Page Only
To set the letterhead to only be on the first page, You can do it in two ways. First by adding Section Break (Next Page) on the first page. Second, with different odd and even page options. You can choose one of the two ways.
Add Section Breaks (Next Page)
You can make a letterhead or header different ones in Word by adding Section Break (Next Page). Besides that, You can too create page numbers different uses Section Break (Next Page).
Steps to set letterhead in Word only first page:
- Add Section Break on the first page. The method, place the cursor at the end of the first page, then click tab Layout ->Breaks->Next Page
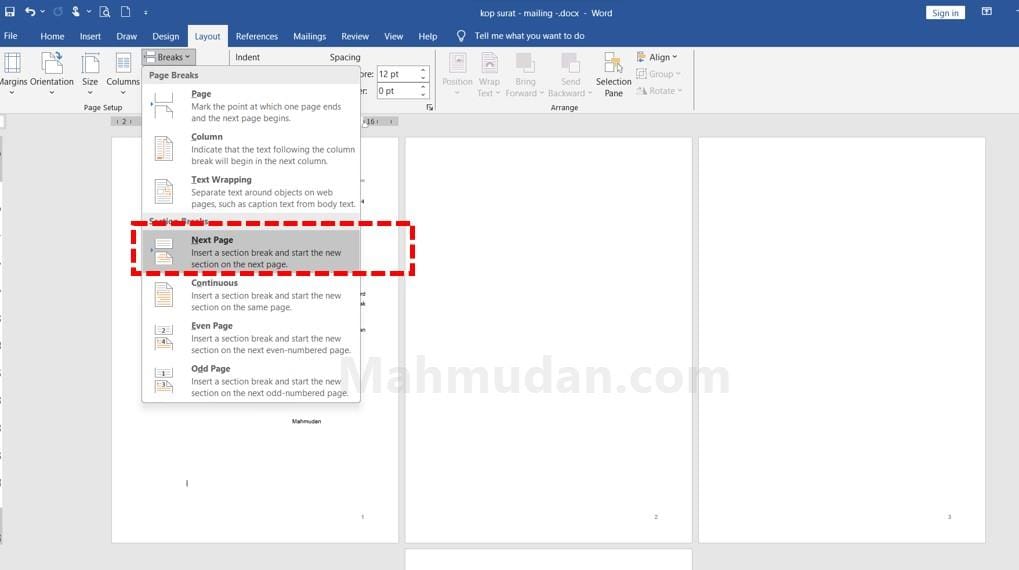
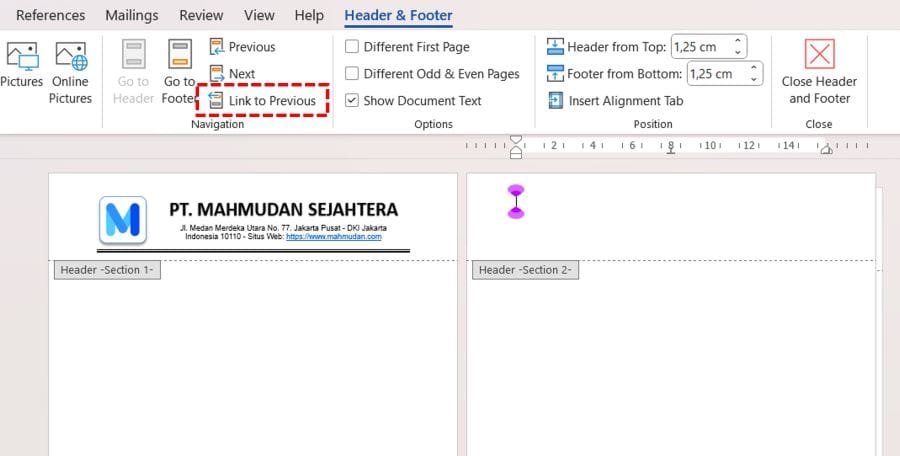
- Double click on Header page 2 then turn off the option Link To Previous.
- Remove letterhead or header on the second page of the Word document.
Different Odd and Even Page Options
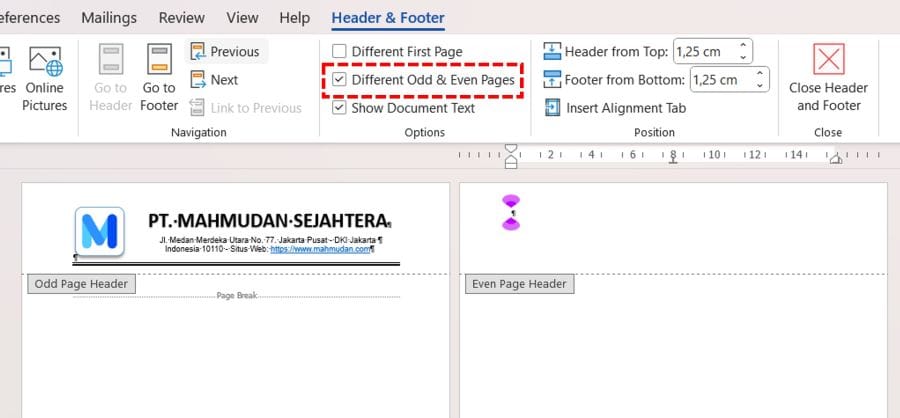
You can make a letterhead or Header different for odd and even pages by activating different odd and even page options. So in this way you can set the letterhead in Word only on odd or even pages.
To enable different odd and even page options, do the following steps:
- Activate Header,
- On the tab Headers and Footers, enable option Different Odd & Even Pages
These are the steps on how to make a letterhead in Word and how to set the letterhead only on the first page, Hope it is useful.

That's great, min….
Tutorial on using keyboard keys to type commands in Word without having to use the menu bar
Comments are closed.