While working in Word, By default, the paper orientation used is Portrait or Landscape, You can easily change the paper orientation via the tabs Layout -> Orientation.
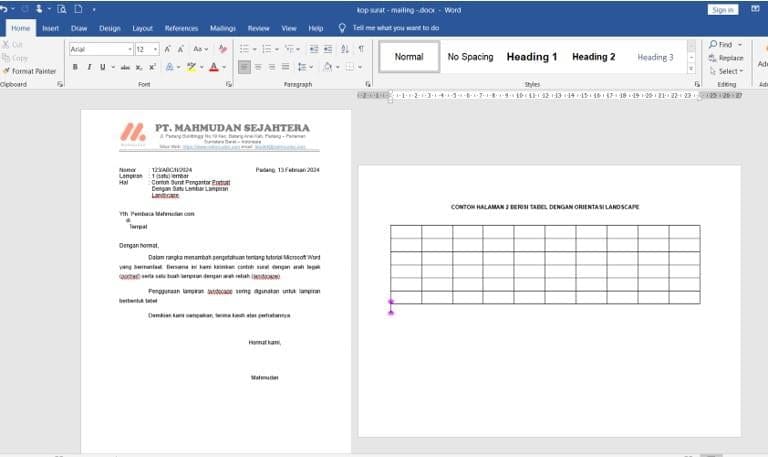
But what if you need to make a letter with Portrait orientation along with an attachment in the form of a table or picture with Landscape orientation?
You don't need to create a separate document, You can set different orientations, Portrait and Landscape in one document Word.
This article will explain simply how to set up Portrait and Landscape 1 Word document.
Steps to Arrange Portrait and Landscape in one Word document:
Steps 1: Add Section Breaks
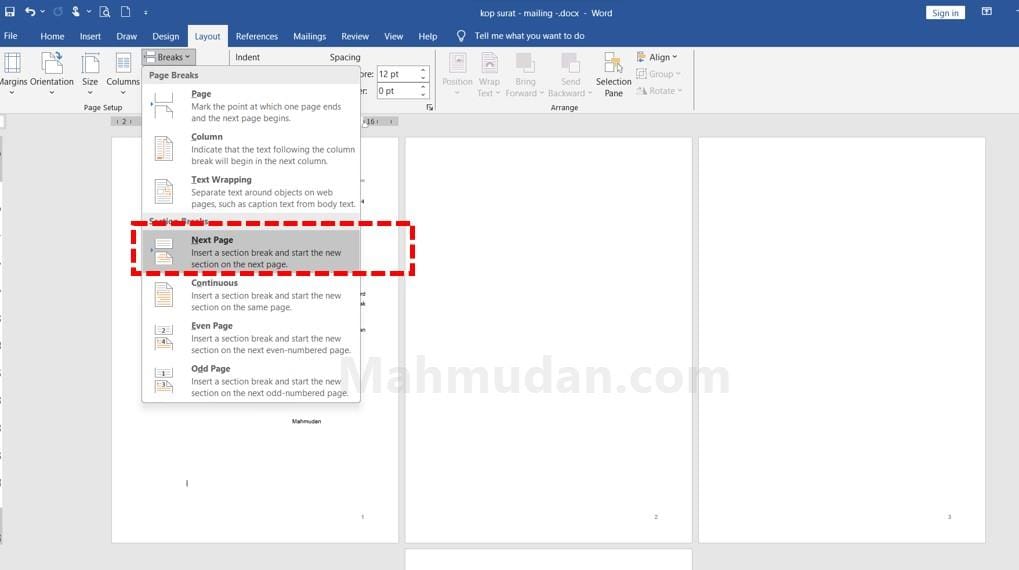
Section Break (Next Page) serves to separate the format of the previous page from the next page. To add a Section Break (Next Page), do the following:
- Place the cursor at the end of the previous page (example: first page), then select tab Layout ->Breaks->Next Page

Steps 2: Change Page Orientation
After adding Section Break (Next Page) on the previous page, You can change the orientation of the next page without affecting the previous page.
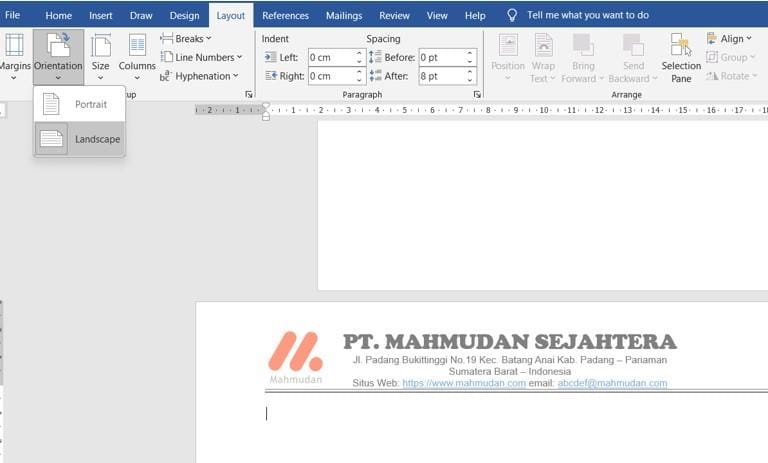
Changing page orientation is very easy, in the following way:
- Place the cursor on the page you want to change the orientation, then select tab Layout ->Orientation->Landscape

Closing
Setting portrait and landscape pages in one Word document is quite easy, with just two steps, namely adding Section Break (Next Page) on the previous page then change the orientation of the next page.
If you want to change the next page (third or fourth page) with portrait orientation, You can repeat the two steps above.

By adding Section Break (Next Page) on the page, You can apply different Header and Footer contents to the page. Like the example above, The first page header has a letterhead, while the second page is without letterhead.
Apart from being able to set different page orientations, You can too create a letterhead in Word only on the first page.
Hope it's useful