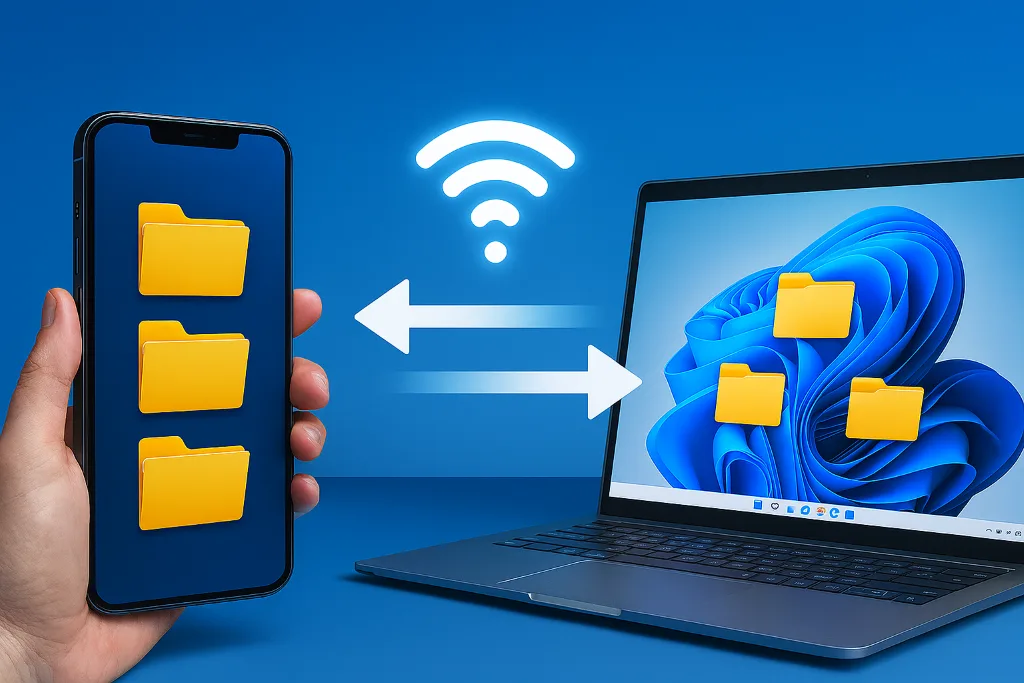
For those of you who have a computer with the Windows-10 or Windows-11 operating system, You can maximize computing resources that are only available to Windows-10 or Windows-11 users with an Enterprise license, Pro, or Education.
What a great resource Windows has 10/11 Enterprise, Pro, or Education is the ability to create virtual machines using Hyper-V.
By following this comprehensive guide, You will be able to create your own CentOS-7 virtual machines with Hyper-V for a variety of uses.
List of contents
What is Hyper-V?
Hyper-V is a hardware virtualization product created byMicrosoft which functions to create and run versions of computer software, which is called a virtual computer. You can read more tentang Hyper-V
Each virtual machine acts like a complete computer. With Hyper-V you can run operating systems and programs, and can run more than one virtual machine on the same hardware at the same time.
With Hyper-V, You can create and run several other operating systems at once on your computer. Apart from being able to create virtual machines CentOS-7, You can too create a Windows-7 virtual machine with Hyper-V.
What is CentOS-7?
Cent OS (Community ENTerprise Operating System) is a Linux distribution based on the Red Hat Enterprise Linux source code (RHEL). Designed to provide a stable enterprise computing platform, free, and based on open source.
With CentOS 7, You can install and run Apache web server with it. CentOS 7 often used in servers and hosting, this is because CentOS 7 safer and more stable.
Preparation
Several requirements must be met to create a CentOS-7 virtual machine with Hyper-V:
- Windows 10/11 Enterprise, Pro, or Education
- 64-bit processor withSecond Level Address Translation (SLAT).
- CPU support for VM Monitor Mode Extension (VT-c on Intel CPUs).
- Minimum memory 4GB
- Minimum 40GB free storage space
- Activate Hyper-V. You can read the guide how to enable Hyper-V.
- File ISO Image (.iso) operating system CentOS-7. In this guide using CentOS-7-x86_64-Minimal-2009.iso
Creating a CentOS-7 Virtual Machine with Hyper-V
The best step to create a CentOS-7 virtual machine on Hyper-V is to use Virtual Machine Wizard.
Step 1: Using the Virtual Machine Wizard.
To useVirtual Machine Wizard, do the following small steps:
- Open Hyper-V Manager, if you can't find it on Start Menu try to find it via the search feature, click the search icon then type Hyper-V
- On Hyper-V Manager, in part Action, click New -> Virtual Machine, window New Virtual Machine Wizard will be open.

- The initial appearance of the Virtual Machine Wizard. Order the Centos virtual machine 7 can run well, some settings need to be made, then click Next Next

Step 2: Specifies the Name and Location of the Virtual Machine.
In this section the system asks you to specify the name and location of the virtual machine.

Fill in the required sections as follows:
- In the fieldName, type a name for the virtual machine, example: CentOS-7
- For virtual machine location, By default the virtual machine will be created in location C:\ProgramData\Microsoft\Windows\Hyper-V. You can choose to determine the location of the virtual machine yourself.
- If you want to choose a different location, chooseStore the virtual machine in a different location, then select the location via the buttonBrowse..
- Once the location of the virtual machine is determined, click Next to continue.
In this tutorial, I chose to store the virtual machine in a different location
Step 3: Selecting a Virtual Machine Generation
The CentOS-7 virtual machine to be created is generation 1, therefore chooseGeneration 1 then clickNextto continue

Step 4: Determining the Virtual Machine Memory Size
Just like a normal computer machine, Virtual machines also need memory to work. Therefore you need to determine how much memory you allocate to the virtual machine.
Notes: The virtual machine's memory size will increase the computer's physical memory usage when you run the virtual machine.
At this stage, do the following:
- In the fieldStartup memory, Enter the desired number of MB, for CentOS-7 the minimum is 1GB or 1024MB, You can choose larger if your computer's memory capacity is sufficient.
- ChooseUse Dynamic Memory. You can learn more about Hyper-V Dynamic Memory
- Then clickNext to continue

Step 5: Configuring Virtual Machine Networking
You can ignore this part and move on to the next stage. This step was selected because you have not yet created onevirtual switch. Configuring a virtual machine network is discussed separately in sectionConnecting Virtual Machines to the Network in this guide.
ClickNextto continue.

Step 6: Connecting a Virtual Hard Disk
Just like a normal computer machine, Virtual machines require storage space, namely a virtual hard disk, to install the operating system. Therefore you need to connect the virtual hard disk with the virtual machine.
In this guide, assume that you don't have a virtual hard disk yet, then you need to create it. At this stage, do the following:
- ChooseCreate a virtual hard disk.
- In the fieldName, type a name for the virtual hard disk.
- OnLocation, The system will create a virtual hard disk in the same location as the virtual machine location. You can choose another location if necessary.
- In the fieldSize, fill in the required measurements, minimum is 30GB
- Then clickNext to continue

Step 7: Determining Installation Options
In this section you are asked to select a source for installing the virtual machine operating system. As prepared at the beginning, You will use an ISO Image file (CentOS-7.iso) as the installation source
At this stage, do the following steps:
- Choose Install an operating system from a bootable CD/DVD-ROM
- Choose Image file(.iso), then select the location where your CentOS-7.iso file is located via the button Browse
- Click Next to continue

Step 8: Completing Virtual Machine Creation
The settings for creating the CentOS-7 virtual machine have been completed, then clickFinish to finish creating the virtual machine. The Hyper-V system will create a virtual machine according to the settings you have made.

At this point the process of creating a CentOS-7 virtual machine has been completed, the next step is to connect the virtual machine to the network.
Connecting Virtual Machines to the Network
By connecting the virtual machine to the network, You can utilize the resources provided by the network as well as by the machine itself. Therefore, this section is very important so it needs to be created as a separate section.
The steps required to connect a virtual machine to a network are to create new virtual switch use Virtual Switch Manager, then change the network settings on the virtual machine.
Step 1: Using Virtual Switch Manager
To use Virtual Switch Manager, back toHyper-V Manager, then on sectionAction, chooseVirtual Switch Manager

Step 2: Creating a New Virtual Switch
To create a new virtual switch, in the Virtual Switch Manager display, follow these steps:
- In part Virtual Switches, click New virtual network switch
- In part Create virtual switch, click External
- Then click the button Create Virtual Switch

- In the field Name, type a name for the virtual switch, example: V_LAN
- On Connection type, choose External network, select an available network device, then click Allow management operating system to share this network adapter
- Click OK

- In the confirmation dialog boxApply Network Change clickYes

Step 3: Changing Network Settings on a Virtual Machine
After creating a new virtual switch, the next step is to change the network settings on the virtual machine.
To change settings on a virtual machine, onHyper-V Manager, right click on the CentOS-7 virtual machine name, then selectSettings, then the virtual machine settings window will appear

In the virtual machine settings, do the following:
- In part Hardware, choose Add Hardware. In the Add Hardware section, choose Network Adapter then click the button Add
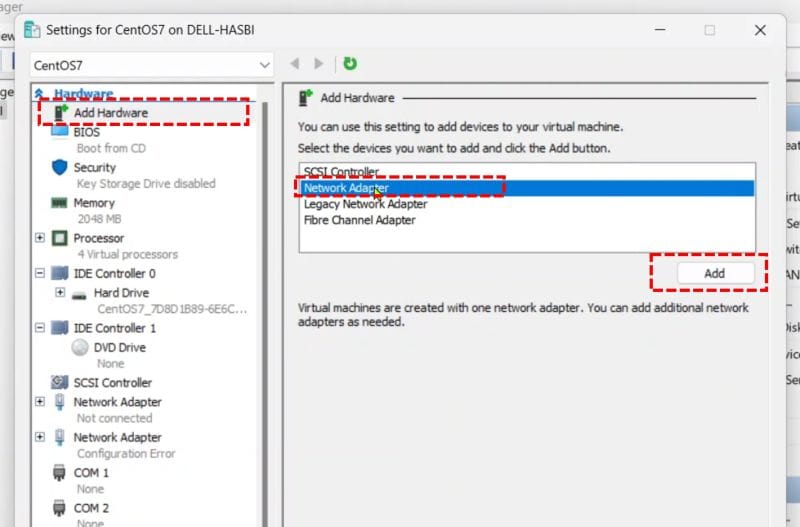
- Select the Network Adapter section, in part Network Adapter, on optionsVirtual switch, select the name of the virtual switch that you created previously. Click Apply to apply the changes later OK to save
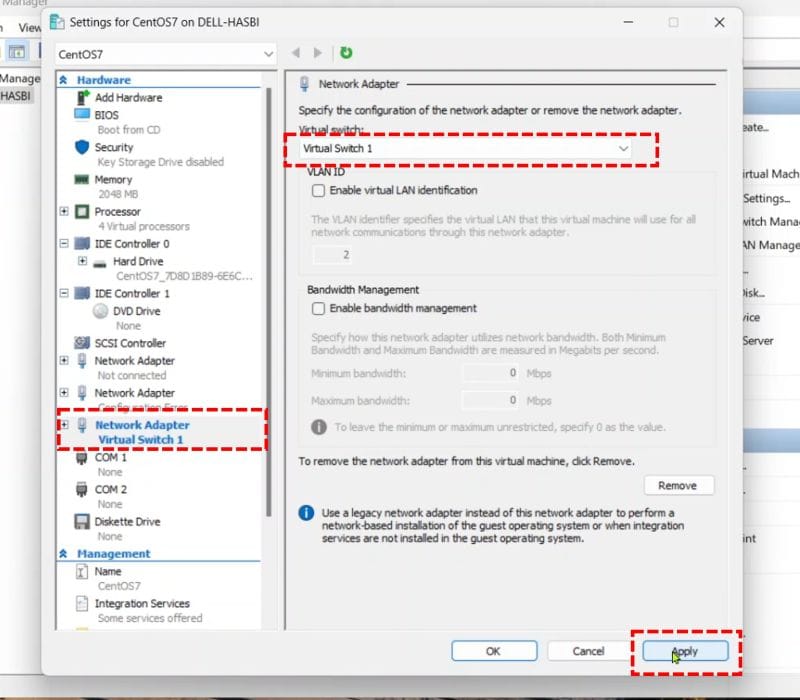
The network setup of the CentOS-7 virtual machine has been completed. The next step is to run the virtual machine.
Running a Virtual Machine
To run, view and access the CentOS-7 virtual machine that you have created, do the following:
- Return to Hyper-V Manager, right click on the virtual machine name, then click Connect, then the system will display a window or screen connecting to the virtual machine.

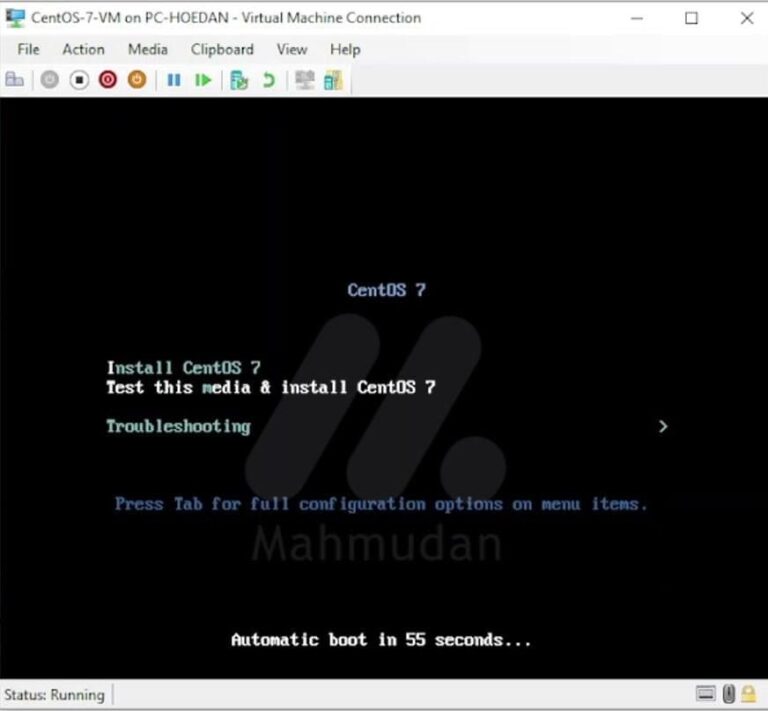
- On the CentOS-7 virtual machine screen display, You can see the current status of the CentOS-7 virtual machineOff. ClickStart to run a virtual machine

- When you run a virtual machine, You can start and complete the process immediately installing the CentOS-7 operating system.

After the installation is complete, The virtual machine will run like a normal computer

Cover
Creation of a CentOS-7 virtual machine using Hyper-V on Windows 11 has finished. Now you can use the Centos-7 virtual machine as a virtual web server by installing the Apache web server.
In addition to creating a CentOS-7 virtual machine using Hyper-V, You can too create a CentOS-7 virtual machine with VirtualBox.
One of the advantages of Hyper-V compared to VirtualBox is that the virtual machine continues to run even if you close the connecting screen. And that's even better, the virtual machine will automatically start when you restart the physical computer, as long as you don't shut down the virtual machine.
Watch the video tutorial for creating a CentOS virtual machine 7 using Hyper-V on Windows 11
Hope it is useful.

