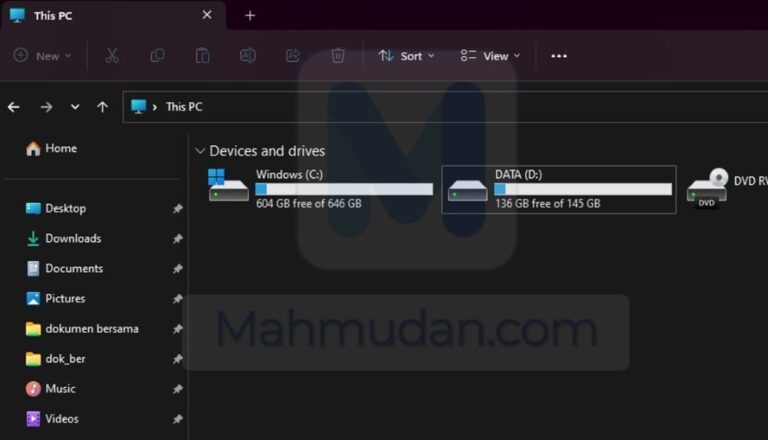
Creating partitions in Windows is a basic skill that is very useful for organizing data and protecting important files. This guide will specifically answer the needs of those of you who have just bought a laptop with Windows 11 and only found one C drive.
By creating a new partition, you can:
- Separate operating systems of personal data for better security.
- Organizing files more neatly, for example separating work documents, multimedia, and applications.
- Makes the backup process easier and system recovery without disturbing personal data.
This step by step guide will teach you how to create a new partition in Windows 11 safely use Disk Management—built-in tools Windows which is powerful without the need for additional software.
The same method can also be applied to create a new partition in Windows 10 and Windows 7. Make sure to follow each instruction carefully for optimal results.
List of contents
Using Disk Management
You can find Disk Management via the search box on Start Menu. Open the search box then type “disk management” then select Create and format hard disk partitions.

At the window Disk Management You can view the listing information Disk as well as existing partitions on your device. You can see the type, file system, status and capacity of each Disk. If you have more than one disk, besides Disk 0, You will also see Disk 1, or Disk 2 and so on.
To make it easier for you to follow this guide, assume that currently you only have Disk 0, practice in this guide also uses Disk 0.
Preparation
Before starting to create a new partition in Windows 11, Read the terms and follow each step in this guide carefully and carefully.
ATTENTION: Errors in this action can result in data loss or system failure.
Condition:
- On Disk 0, You must have free space of sufficient size for a new partition, for example 10GB or larger. Unused or unallocated space on Disk 0 labeled Unallocated with black shading.
- If the space with the label Unallocated on Disk 0 not sufficient, You need to shrink the existing partition so that the space with the label Unallocated become bigger. Therefore the first step is to create a new partition in Windows 11 this will start by shrinking the existing partition.
- If space Unallocated what you have is sufficient, You can proceed directly to step number 3.
Steps to Create Partitions in Windows 10/11

Follow the steps below to create a new partition in Windows:
Total Time: 10 minutes
Step 1: Shrink existing partitions
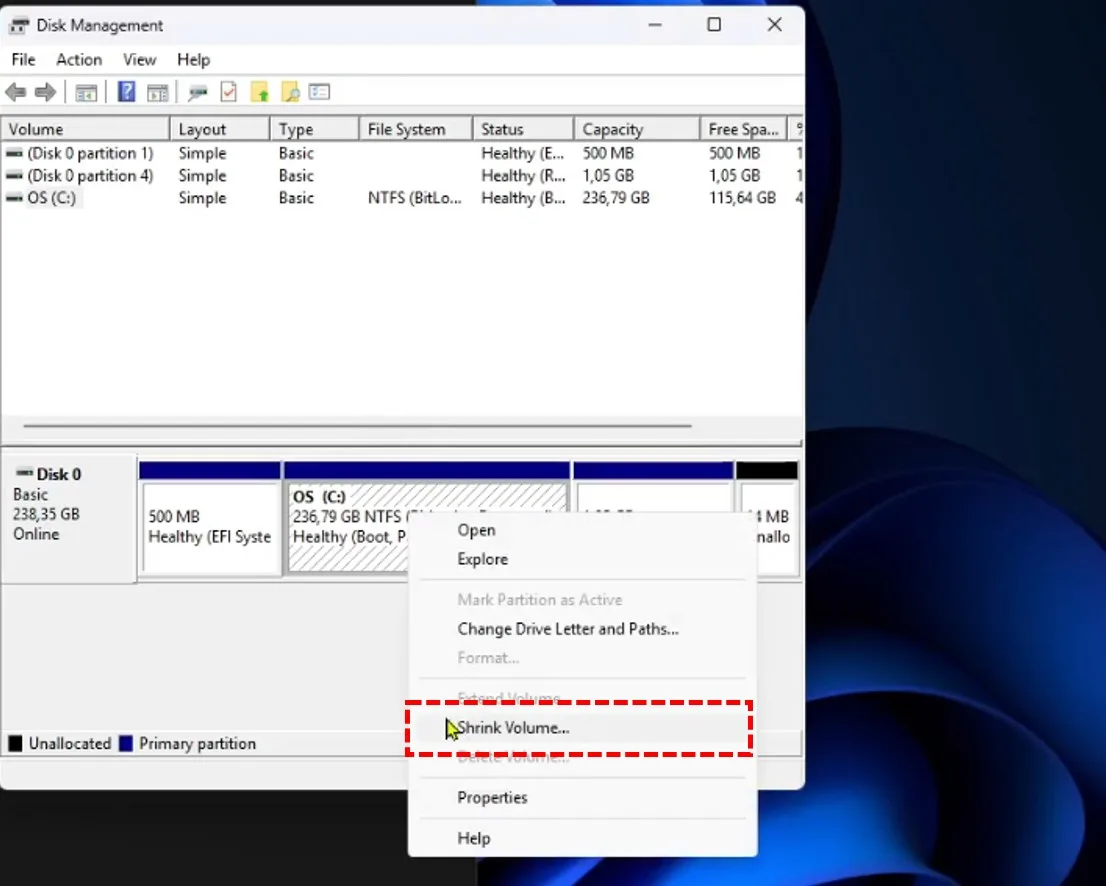
From the disk you selected, You will probably see several partitions, However Not all partitions can be reduced in capacity. Because some partitions are created to support the operating system and for other purposes by the system with a fairly small size. Therefore, partitions that allow shrinking are partitions C:
Right click the partition C: then select Shrink Volume
Step 2: Enter the amount of size you want to shrink
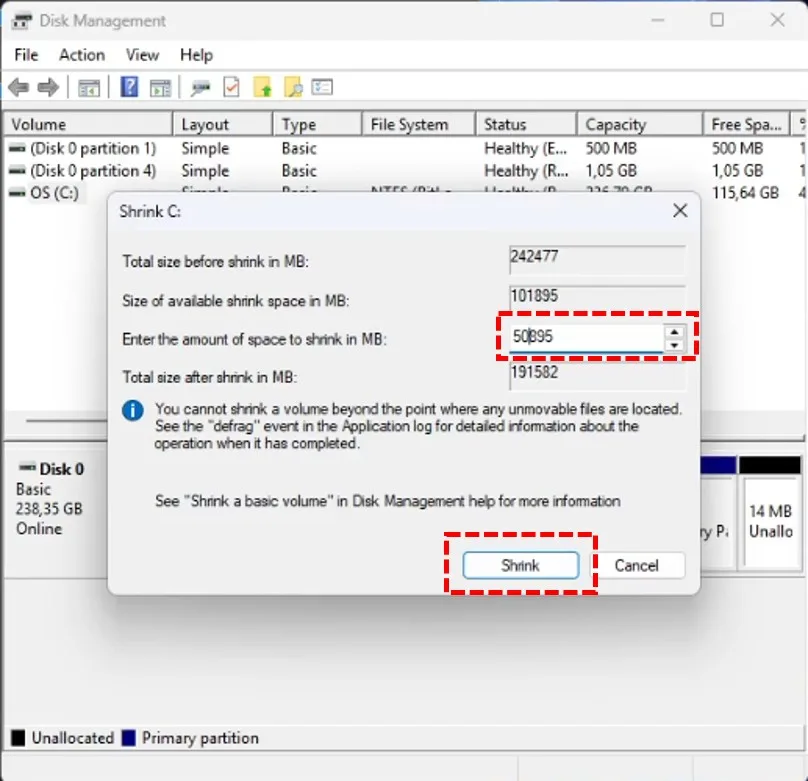
In the field Enter the amount of space to shrink in MB, Enter the amount of size you want to shrink. For example in this guide, initial size batch C: is 242477MB. The size to be depreciated is: 50GB or 50895MB, so that after shrinking the size becomes 191582MB.
You can adjust based on your needs for the new partition and your disk capacity. You also have to consider remaining size of partition C: so it's not too small.
After entering the required shrinkage size, click the button Shrink to start shrinking. After you have done the shrinkage, The system will create a new room with a label Unallocated in disk, or increase the existing size by the number of sizes you have reduced.
Step 3: Create a new partition
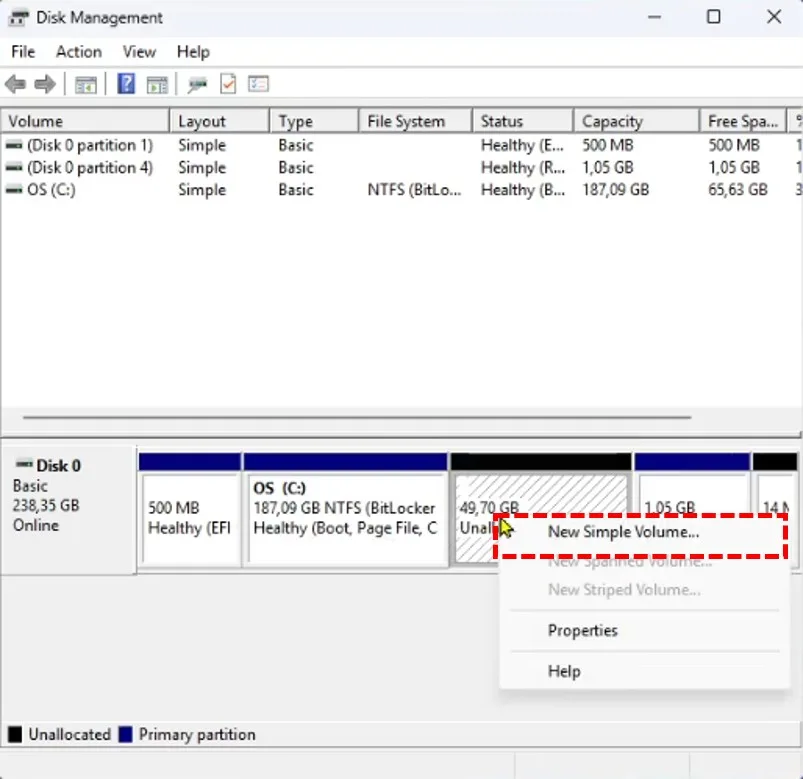
Right click on the space Unallocated (already has sufficient size for a new partition) then select New Simple Volume. Then the window New Simple Volume Wizard will be open.
Step 4: Determine the size of the new partition
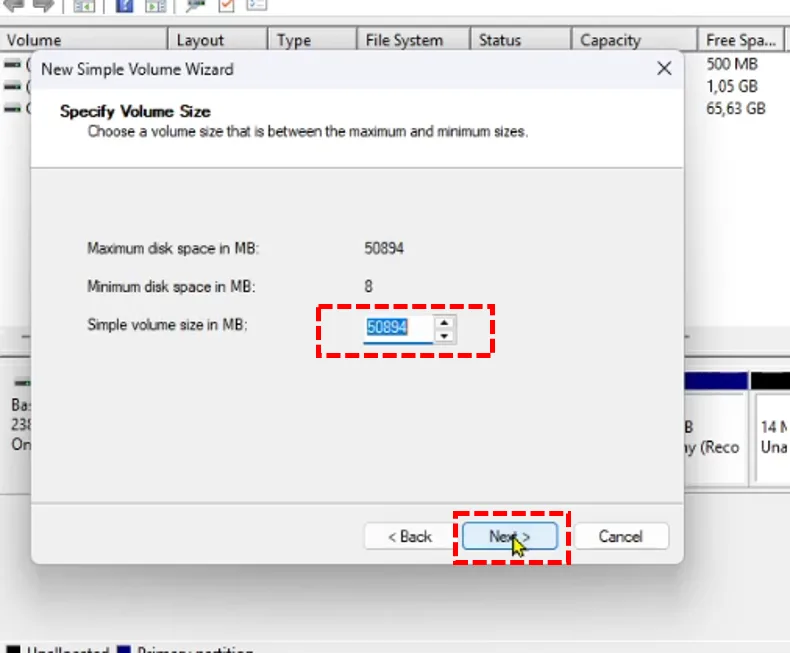
On the window New Simple Volume Wizard, You can specify the size you want to use for the new partition. You can select all existing sizes or leave them to create another new partition by repeating step number three in the future.
Step 5: Set it Drive Letter for the new partition
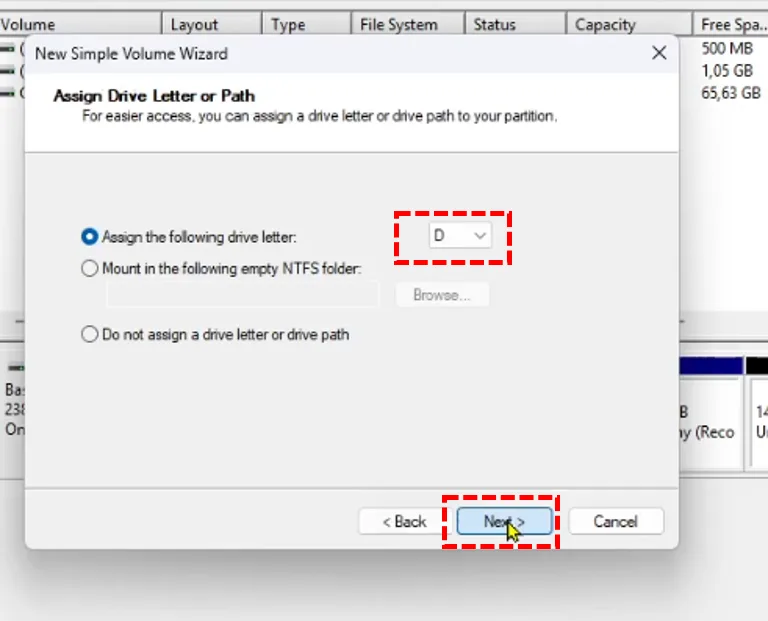
Set it Drive Letter for the new partition, You can choose drive letter from the available list, examples in this guide drive letter the chosen one is D. After selecting drive letter, click Next to continue.
Step 6: Format the new partition
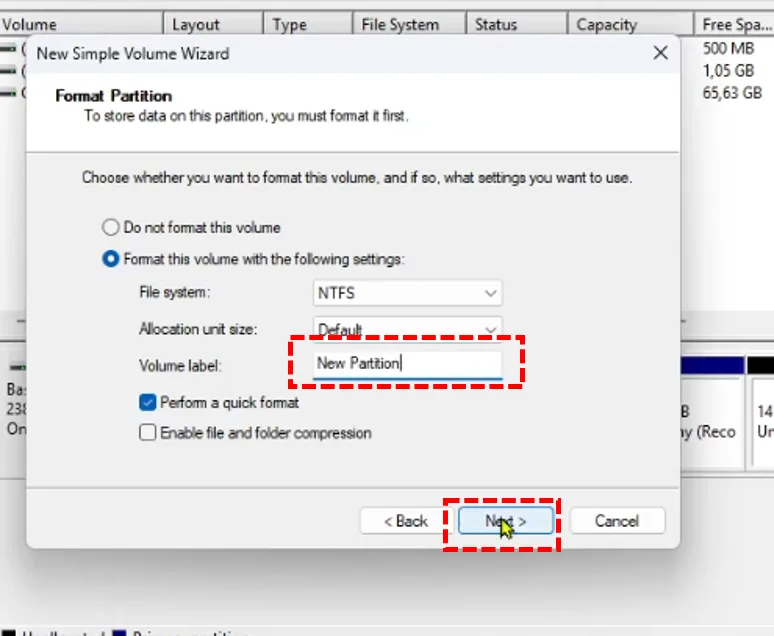
Choose Perform aquick format so that the system formats the new partition and you can use it immediately, You can add labels to sections Volume label with the name you want, example New Partition. Then click Next to continue.
Step 7: Finish creating the new partition
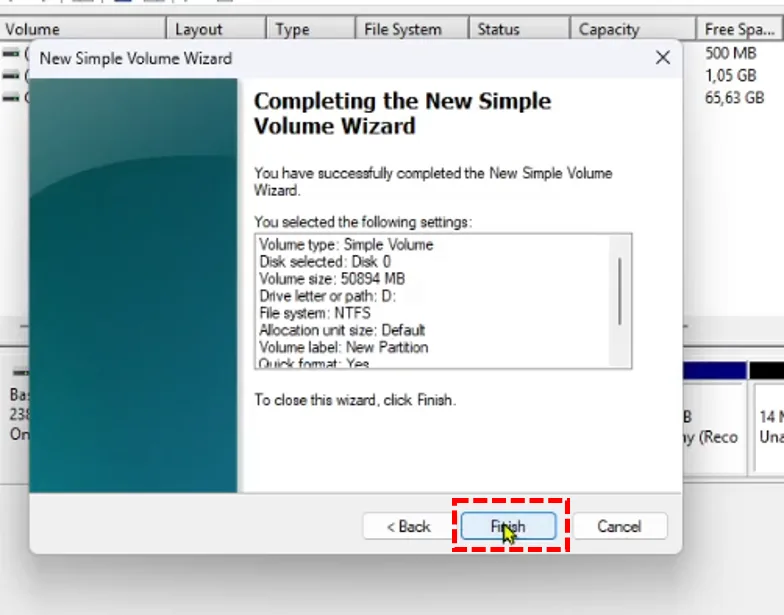
Click Finish to finish creating the partition. After you click the button Finish, the system will complete creating the new partition, You can find your new partition at Windows Explorer
Conclusion
You can create new partitions in Windows 10 or Windows 11 using built-in tools viz Disk Management. This guide has explained the preparations and steps in creating a new partition which you can easily follow.
If you have a lot of unused space remaining, You can create drives D or drives E and so on.
If you still doubt, take a look video how to split and merge partitions in Windows to make you more confident in creating a new partition in Windows-11.
Hope it is useful.

