You can create partitions in Windows 11 or add a new partition without using other applications, so you can have drive D and drive E if possible.
If you have recently purchased a Laptop or PC that has been installed with the Windows-11 operating system, usually you will find only one partition on your device namely drive C, For certain reasons or purposes you may want to add another partition, for example drive D.
The tools used to create partitions in Windows in this guide are Disk Management. Apart from Windows 11, You can also apply this guide to create a new partition in Windows-10 or in Windows-7.
Read and follow this guide carefully to avoid failure in creating a new partition.
Using Disk Management
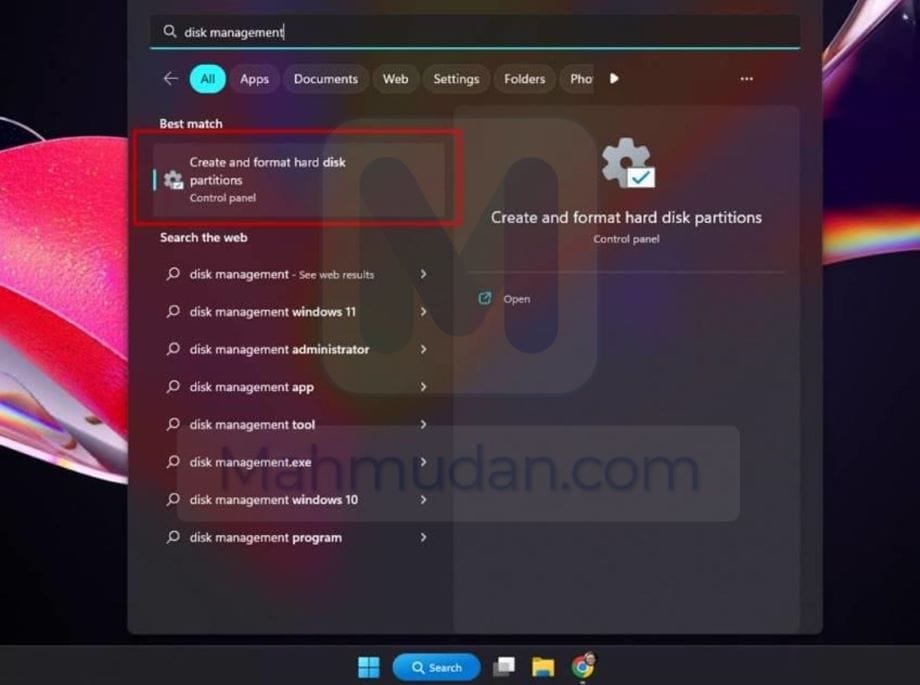
To use Disk Management, You can find this tool via the search box on Start Menu. Open the search box then type “disk management” then select it Create and format hard disk partitions.
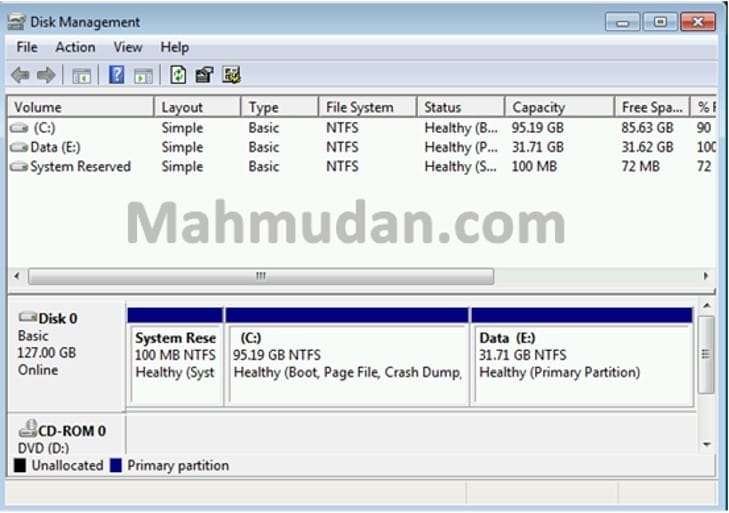
At the window Disk Management You can view the listing information Disk as well as the existing partitions. You can see the type, file system, status and capacity of each Disk. If you have more than one disk, besides Disk 0, You will also see Disk 1, or Disk 2 and so on.
To make it easier for you to follow this guide, assume that currently you only have Disk 0. The practices in this guide also use Disk 0, then follow the following steps in this guide.
On Disk 0, You must have free or unused space of sufficient size for a new partition, for example 10GB or larger. Unused or unallocated space on Disk 0 labeled Unallocated with black shading.
If the space with the label Unallocated on Disk 0 not sufficient, You can shrink an existing partition to free up space Unallocated become bigger. Hence the steps to create a new partition in Windows 11 this will start by shrinking the existing partition.
If space Unallocated what you have is sufficient, You can proceed directly to step number 3.
Before starting to create a new partition in Windows 11, Carefully read each step in this guide. Please note that errors in this action may result in data loss or system failure.
Steps to Create Partitions in Windows
Following are the steps to create a new partition in Windows 11 or other versions of Windows.
Total Time: 10 minute
Steps 1: Shrink existing partitions
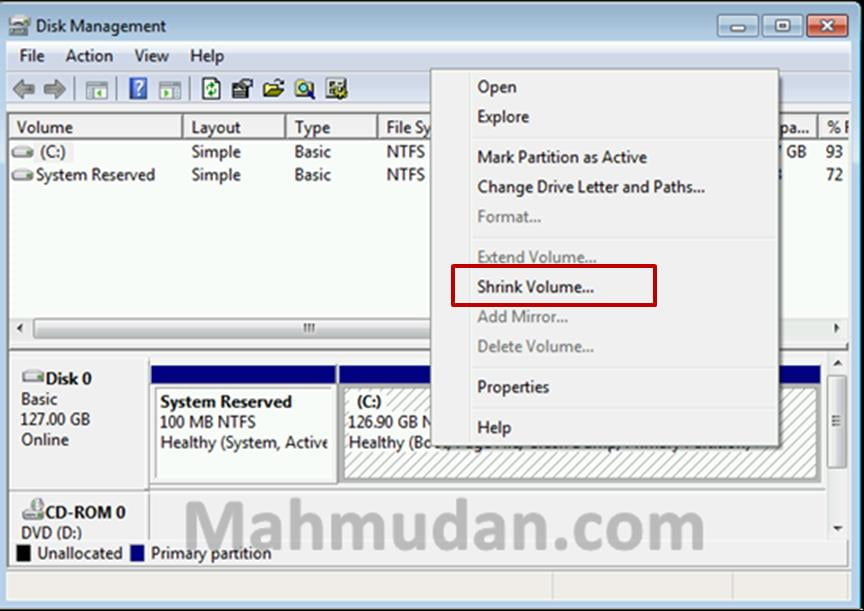
From the disk you selected, You will probably see several partitions, However Not all partitions can be reduced in capacity. Because some partitions are created to support the operating system and for other purposes by the system with a fairly small size. Therefore, partitions that allow shrinking are partitions C:
Right click the partition C: then select Shrink Volume
Steps 2: Enter the amount of size you want to shrink
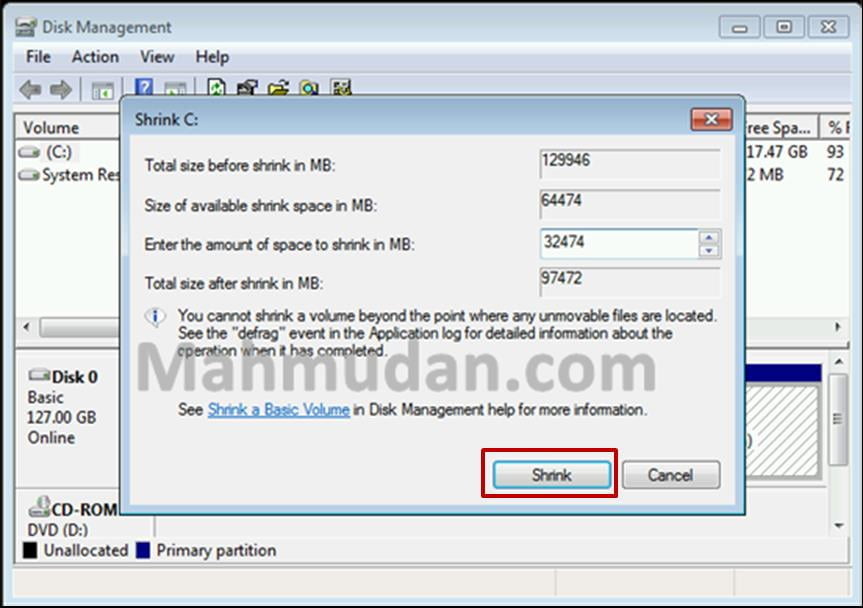
On the field Enter the amount of space to shrink in MB, Enter the amount of size you want to shrink. For example in this guide, initial partition size C: is 129946MB and will be depreciated by 32 GB or 32474 MB, so that after shrinking the size becomes 97472 MB.
You can adjust based on your needs for the new partition and your disk capacity. You also need to consider the remaining size of partition C: so it's not too small.
After entering the required shrinkage size, click the button Shrink to start shrinking. After you have done the shrinkage, The system will create a room with a label Unallocated in disk, or increase the size by the amount you have reduced.
Steps 3: Create a new partition
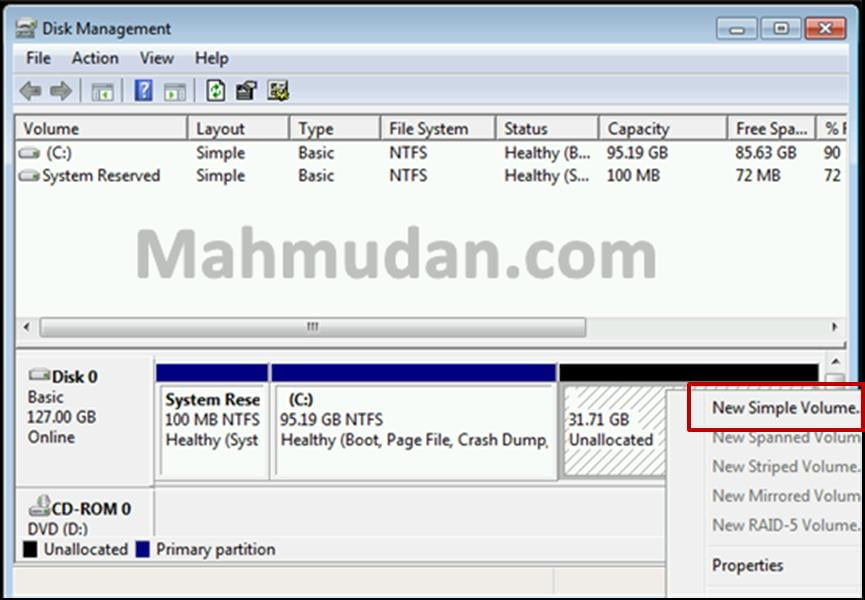
Right click on the space Unallocated then select New Simple Volume. Then the window New Simple Volume Wizard will open.
Steps 4: Determine the size of the new partition
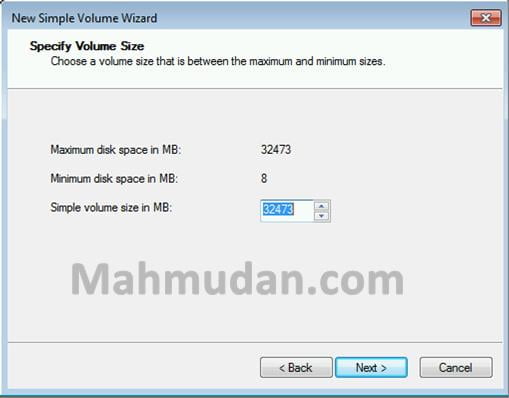
On the window New Simple Volume Wizard, You can specify the size you want to use for the new partition. You can select all existing sizes or leave them to create another new partition by repeating steps from number three.
Steps 5: Set it Drive Letter for the new partition
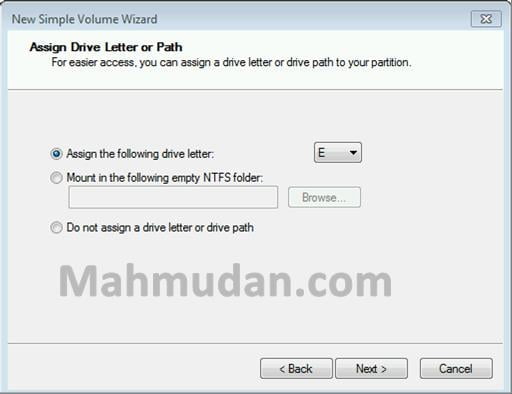
Set it Drive Letter for the new partition, You can choose drive letter from the available list. If you have a lot of unused space remaining, You can create drives D or drives E and so on.
In this guide drive letter the chosen one is E Because drive letter D has been used on another partition. After selecting drive letter, click Next to continue.
Steps 6: Format the new partition
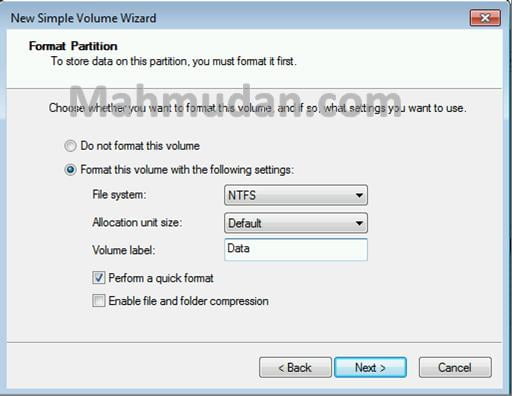
Choose Perform aquick format so that the system formats the new partition and you can use it immediately, You can add labels to sections Volume label with the name you want, example Data. Then click Next to continue.
Steps 7: Finish creating the new partition
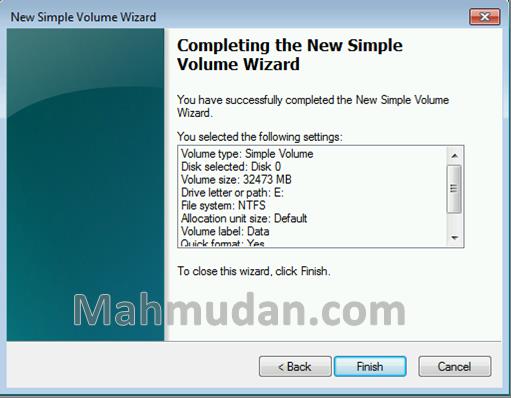
Click Finish to finish creating the partition. After you click the button Finish, the system will complete creating the new partition, You can find your new partition at Windows Explorer
Closing
That's how to create a partition in Windows 11 in 7 practical steps to use Disk Management. After knowing the steps to create a new partition in Windows 11 This, You can create as many partitions as you want without additional tools.
You can watch video how to split and merge partitions in Windows to make it easier to create new partitions in Windows-11.
Hope it is useful.
