You can see the WiFi password that has been connected to a Windows laptop 11 easily, just a few clicks without needing to open the Command Prompt.
If you buy a new device such as a laptop or smartphone and want to connect it to a WiFi device in your home, or to neighboring WiFi devices that have previously connected, but you forgot the password. No need to panic if you forget the WiFi password, You don't need to reset the WiFi device.
You can easily find out the WiFi password that has been connected to a PC or laptop using Windows 11. Microsoft keep updating Windows 11, besides adding new features in Windows 11, they also add setting options, one of which is network and internet settings.
This guide will show you how to view the WiFi password in Windows 11. Not just one password, but you can see all WiFi passwords that have been saved.
Steps to View WiFi Passwords on Windows 11
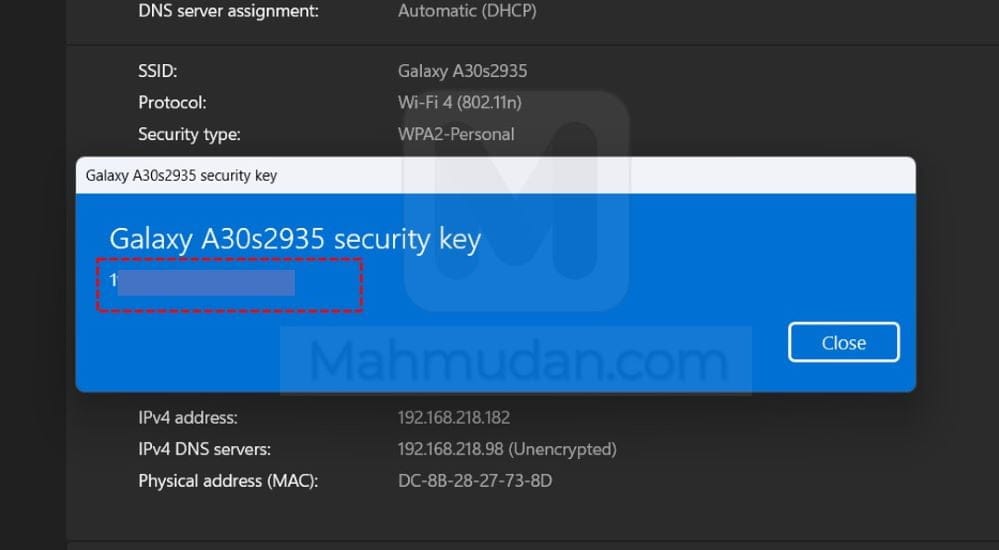
To see the WiFi password in Windows 11, do the five steps below in sequence:
Total Time: 3 minute
1. Open Settings
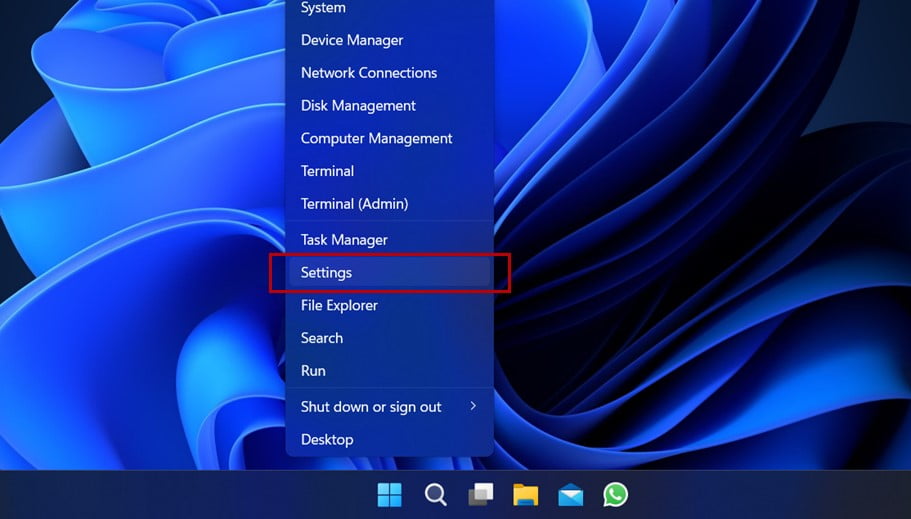
To open Settings, right click on Start Menu then select Settings.
2. Open WiFi Settings
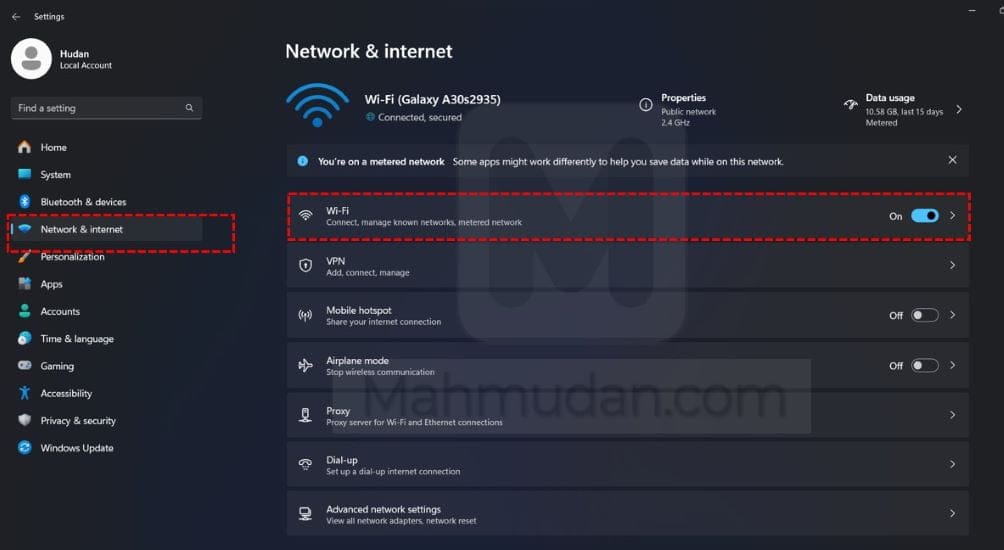
On the menu Settings, select Network & Internet then select Wi-Fi
3. Open Manage known networks
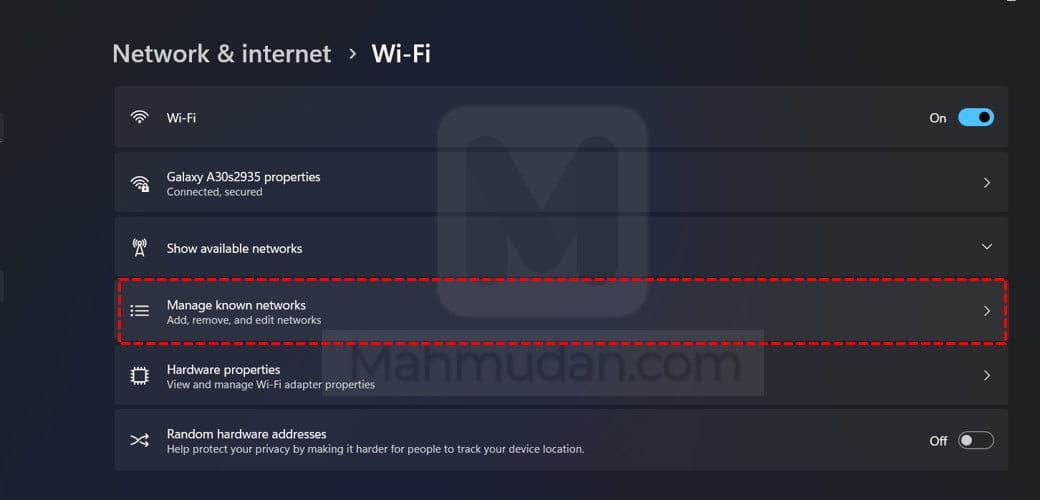
In settings Wi-Fi, select Manage known networks to see a list of Wi-Fi networks that your PC has connected to
4. Select WiFi Network
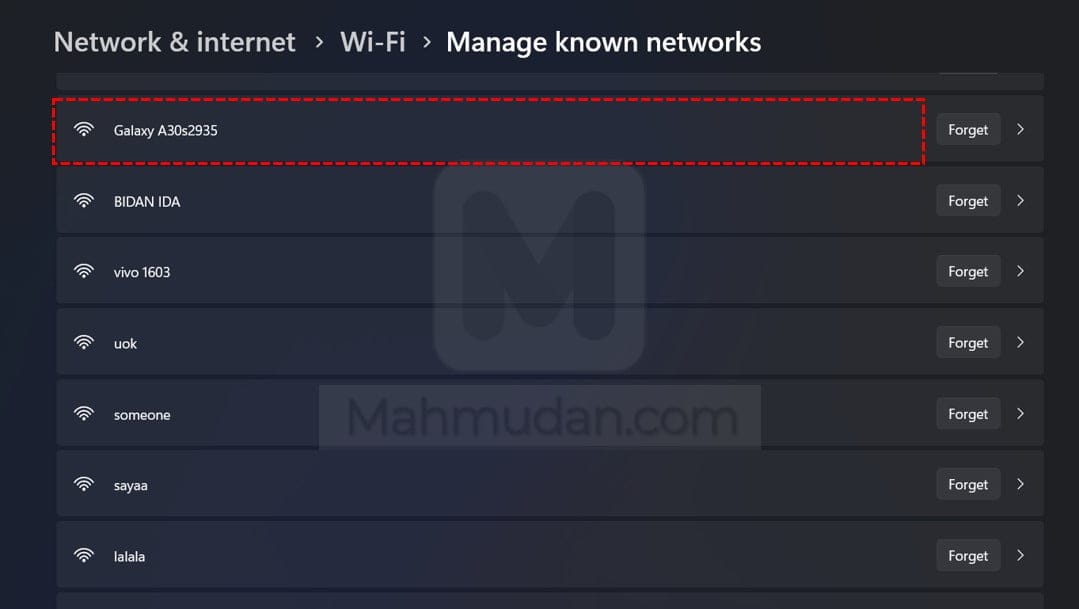
In the Wi-Fi list that appears, select the Wi-Fi name for which you want to see the password, for example Galaxy A30s2935
5. Show WiFi Password
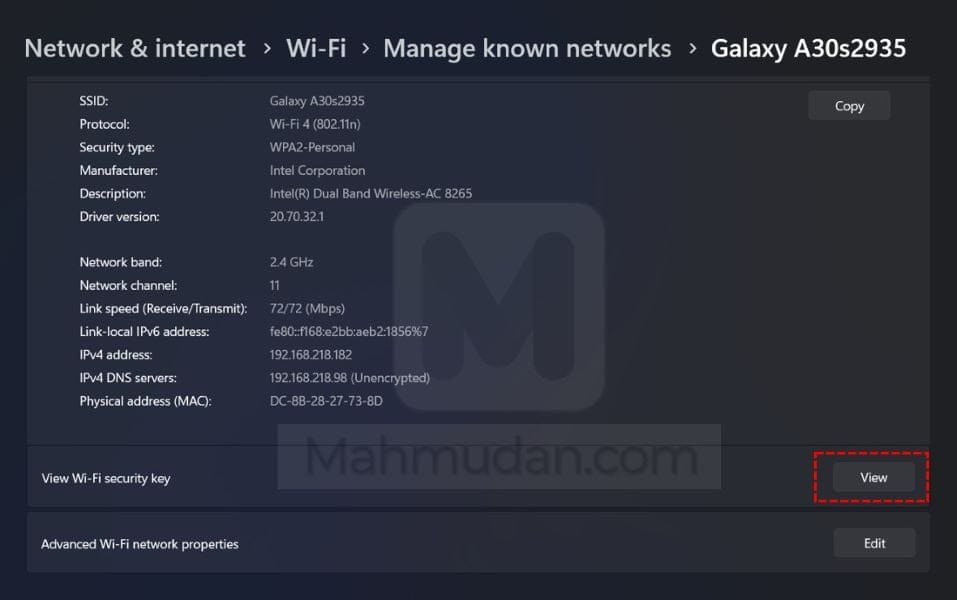
On the Wi-Fi properties you selected (example: Galaxy A30s2935), scroll down until you see the section View Wi-Fi security key, then click the button View to display the WiFi password.
That's how to see the WiFi password in Windows 11, Hope it is useful. Baca other Windows tutorials that is important to you.
