If you have more than one Windows PC 10/11 but only has one printer, You can share a printer installed on one PC to another PC without having to move your device by utilizing a network.
A computer network is a system consisting of two or more computers connected to each other via cable or wireless transmission media (wireless). You can learn briefly about networks in this website
Before you can share the printer on the network, there are a few things you need to do . You need to set sharing options, printer sharing and accessing shared printers.
List of contents
How to Share a Printer on Windows 10 / 11 via LAN
This guide will explain how to set up printer sharing in Windows 10 / 11 via local network (LAN). To make it easier for you, This guide will simulate two computers connected to the same network as follows:
- KEPG-PC using Windows 10 which has a printer with the name EPSON installed,
- MyPC using Windows 11 which will use the printer available on KEPG-PC
You can customize it with your respective computer name. To make it easier to recognize each computer, You can with easily rename PC in Windows 11.
Enable Sharing Options
The first step you have to do is activate the sharing option on the KEPG-PC computer. Enabling the sharing option aims to allow other users or you to access what you share from this computer over the network.
To enable sharing options on the KEPG-PC computer, do the following steps:
- Open Control Panel, select Network and Internet, select Network and Sharing Center, then click Change advanced sharing settings which is on the left side of the screen.
- On display Change sharing options, find section File and printer sharing then select an option Turn on file and printer sharing
- Scroll down until you find the section Password protected sharing. If you want to share a password protected printer, enable this option. If not, then choose Turn off password protected sharing
Don't forget to click the button Save changes to save the changes you have made.
Enable Printer Sharing
After enabling share option, the next step is to enable printer sharing. To enable printer sharing on the KEPG-PC that has been installed with the printer, do the following steps below:
- Open Printer Properties. You can access printer properties via Control Panel or menu Settings. Choose one of the following two methods:
- From Control Panel, select section Hadware and Sound then select Device and Printer, then right click the printer you want to share, for example in this guide is the EPSON L420 printer then click Printer properties, or
- On the menu Settings, select section Devices then click Printer & scanners, select the printer you want to share, for example in this guide is the EPSON L420 printer then click Manage
- From Control Panel, select section Hadware and Sound then select Device and Printer, then right click the printer you want to share, for example in this guide is the EPSON L420 printer then click Printer properties, or
- Enable the option Share this printer. In printer properties, click tab Sharing then activate it (check) option Share this printer. Give a name to the shared printer, for example EPSON then click OK
At this stage, You have finished activating EPSON printer sharing settings on KEPG-PC, The next step is to connect MyPC to the printer that has been shared.
Connect the Computer to the Shared Printer
To connect the MyPC computer to the printer on the KEPG-PC computer, The first thing you have to do is make sure that you can find KEPG-PC on the network via the MyPC computer.
You can connect a shared printer with a MyPC computer in several ways. For now, This guide simply shows the quickest and easiest way to connect a computer to a shared printer.
You can quickly and easily connect a computer with a shared printer by accessing the printer from the network. Follow these steps:
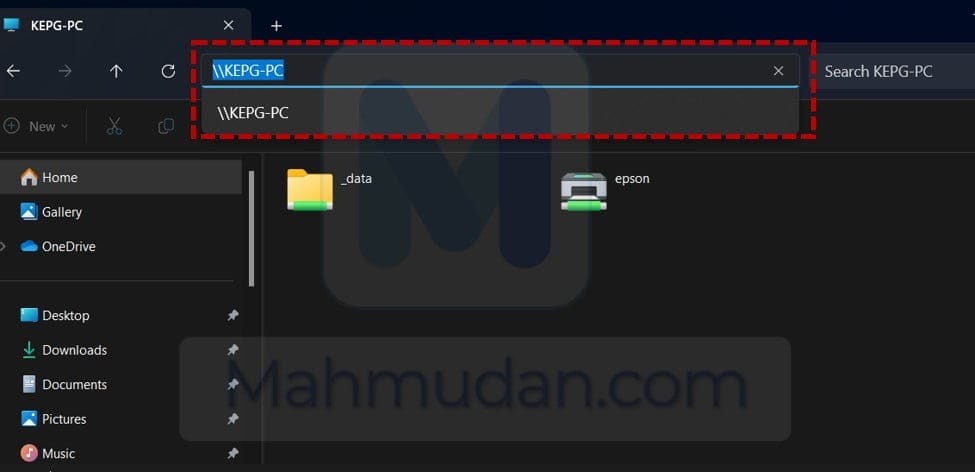
- Find the destination computer. On MyPC computer, open the network folder then find the name of the computer where the shared printer is installed. In this guide, the name of the destination computer is KEPG-PC. You will be prompted to enter username And password if you previously enabled the option Password protected sharing
Tips: You can also find computers on a network using the address bar in Windows Explorer. In the address bar, typing 2 backslash then follow with the computer name, example: \\KEPG-PC

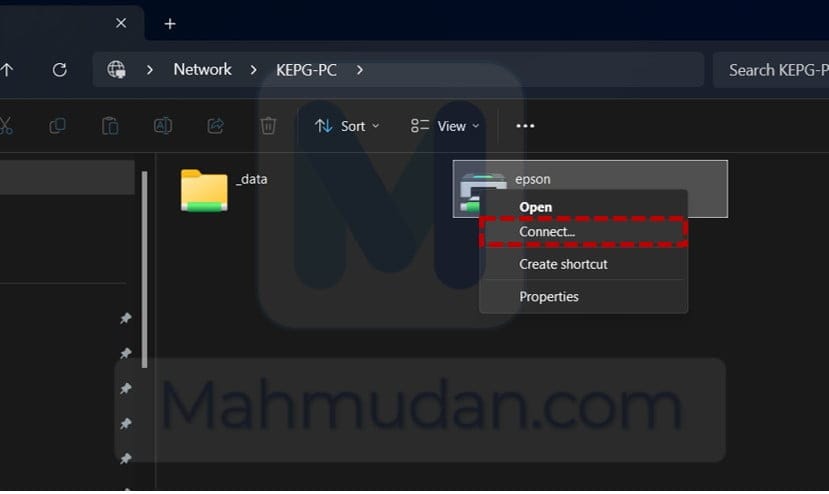
- Connect the printer. After connecting to the destination computer, You can see the shared printers according to the name you have specified. Right click on the printer name then click Connect…

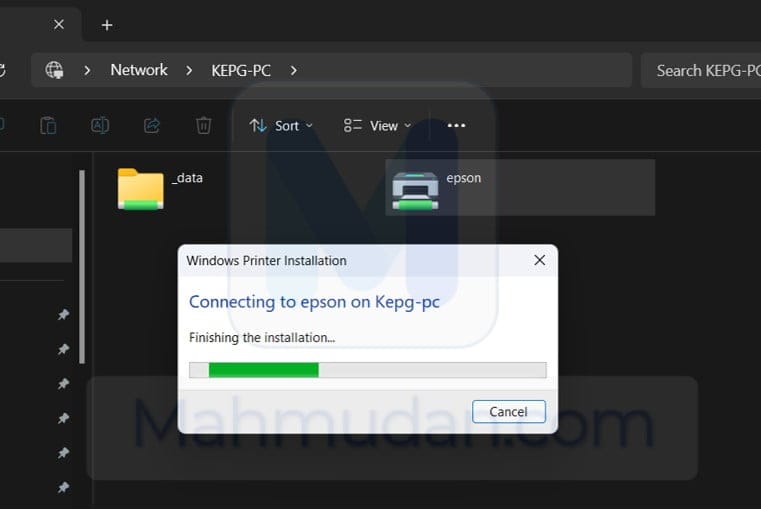
- Printer installation. If it succeed, the system will complete the printer installation.

Using a Shared Printer
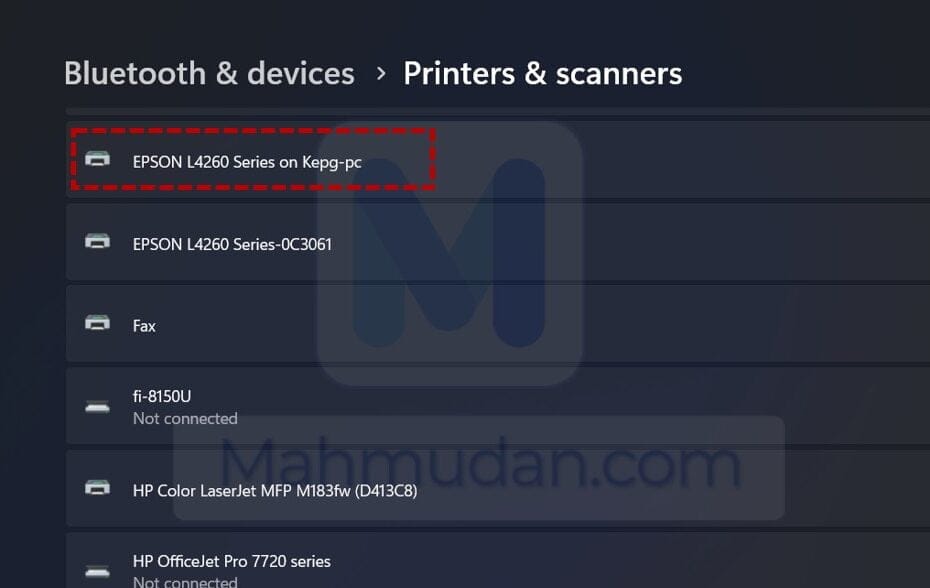
After successfully connecting the MyPC computer with the printer shared from the KEPG-PC computer, You can find the printer name in the printer list on the MyPC computer.
Open Settings, select section Bluetooth & devices, then click Printers & scanners.

You can use the printer as usual as long as the KEPG-PC computer is active.
If you experience problems with sharing the printer over the network, please comment. Hope it's useful.


